Homemade Red Circle buns, filled with cocoa and hazelnuts
Para 8 0.75 €/pers. 420 kcal/100g.
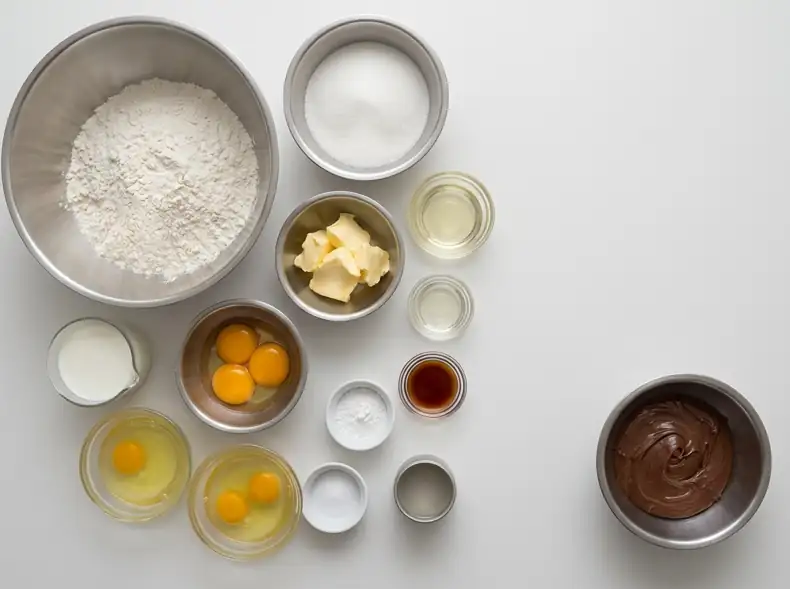
- For the buns:
- 200g of all-purpose wheat flour, without added yeast
- 170 g of white sugar
- 113g of unsalted, soft butter
- 120 ml of whole milk, at room temperature
- 3 medium-sized egg yolks
- 2 medium-sized egg whites
- 15 ml of sunflower oil
- 5 g of baking powder or chemical yeast
- 1 teaspoon of vanilla extract or paste
- 2 g of salt
- Oil or non-stick spray for the mold
- For the filling:
- 140g of cocoa and hazelnut cream, with a firm consistency
- Preheat the oven to 175°C (350°F), using the top and bottom heating elements. Grease eight oblong baking tins. If they are small, this amount of batter will make ten buns; in that case, reduce the baking time slightly.
- Sift the flour with the baking powder and salt. Set the mixture aside and separate 30g of the sugar to whip the egg whites later.
- Place the softened butter and the remaining 140g of sugar in a large bowl. Beat for four to five minutes, until the mixture is pale and airy. Scrape down the sides of the bowl a couple of times to ensure no unincorporated areas of butter remain.
- Add the egg yolks one at a time. Don't add the next one until the previous one is fully incorporated. Add the oil and vanilla and beat for a few more seconds.
- Add one-third of the flour and mix at low speed. Pour in half the milk, add another third of the flour, the remaining milk, and finally the dry ingredients. Stop mixing as soon as you have a smooth, creamy batter.
- In another bowl, whisk the egg whites. When they begin to foam, gradually add the reserved 30g of sugar. Whisk until you achieve medium, glossy peaks; you don't need a stiff meringue.
- First, we mix one-third of the egg whites into the batter to lighten it. We add the rest in two batches, using a spatula and broad movements. We keep as much air in as possible, avoiding any white streaks.
- We divide the batter in the mold, filling each cavity to two-thirds of its height. We smooth the top and wipe away any drips that may have fallen outside the cavities.
- Bake for 15-18 minutes. If making ten medium-sized buns, start checking them after 13 minutes. The buns should be golden brown, with the edges slightly pulling away from the pan and the center firm to the touch.
- Let them rest for five minutes and carefully unmold them. Place them on a wire rack until completely cool. The base may be slightly domed; you can even it out by removing a very thin layer with a serrated knife.
- Stir the hazelnut and cocoa spread until smooth. If it's too stiff, dip the bowl in warm water for a few seconds. It should become more fluid, but never hot.
- Transfer the cream to a piping bag fitted with a narrow filling nozzle. Pierce the base of the first bun in three places, being careful not to pierce it completely. Pipe about 5-6 g of cream into each opening.
- Repeat with the rest, holding each piece gently. When you notice the surface rising or the cream starting to ooze out of the hole, stop pressing.
- We wait half an hour before serving. The filling will regain its consistency and the small openings in the base will be sealed by the crumb itself.
- The butter should give when pressed, but it shouldn't be shiny or half-melted. Butter that's too hot won't retain the air in the batter.
- Adding the egg yolks one at a time prevents the emulsion from separating. If this happens, add a tablespoon of flour and continue whisking.
- Once the flour is added, mix just enough. Overworking the dough develops the gluten and produces chewy rolls.
- The cocoa cream should be fluid but not hot. If it gets too hot, it will soak into the crumb and may even seep through the surface.
- A 4-6 mm nozzle allows you to fill without creating large holes. Avoid removing crumbs or creating a tunnel from one end to the other.
- Each bun can hold about 15-18g of filling. Exceeding that amount greatly increases the risk of breakage.
- We store them in an airtight container for three days in a cool place. In high temperatures, it's best to refrigerate them and let them come to room temperature before serving.
The classic Red Circle wasn't a chocolate cake. It had a golden crumb on the outside, and when cut, it revealed several pieces of hazelnut and cocoa cream. This distinction allows it to be separated from later versions with dark cake and also from the vanilla Twinkie, whose filling is white.
The butter adds flavor and a denser crumb than Twinkies. The small amount of oil prevents the pastry from becoming too hard as it cools, while the whipped egg whites soften the already rich dough. The filling should be distributed evenly; if you fill the entire center, the pastry will become a fragile tube that breaks when you pick it up.
Among the blog's sweet treats, the two-tone chocolate cake offers a unique combination of vanilla and cocoa. The chocolate brownie with walnuts has a much denser texture, and the chocolate and Nutella cake takes advantage of the same relationship between chocolate and hazelnuts in a cake format.