Japanese obanyaki (imagawayaki), small cakes filled with anko
Para 4 0.8 €/pers. 220 kcal/100g.
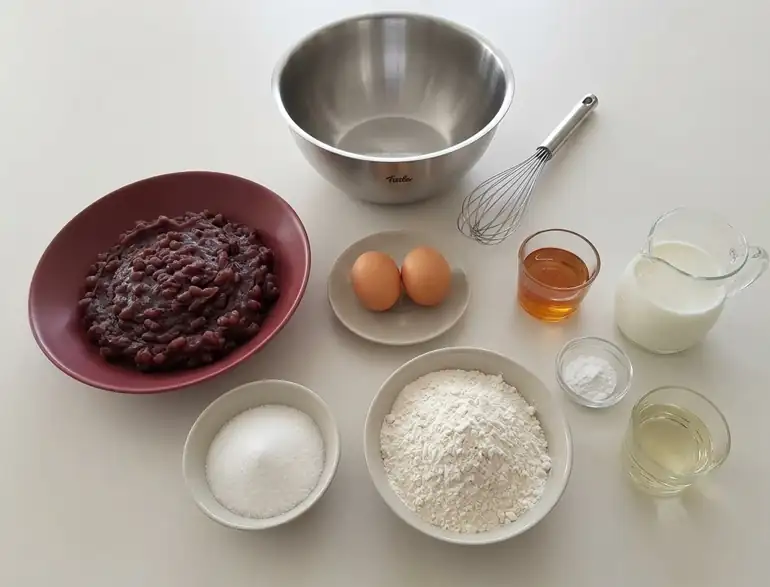
- 2 large eggs
- 25g of white sugar
- 40 g of honey
- 300 ml of whole milk
- 240g of all-purpose wheat flour
- 8 g of baking powder or leavening agent
- 400g of anko tsubuan, sweet azuki bean paste with bits
- 10 ml of mild vegetable oil
- Place the eggs and sugar in a large bowl. Whisk until well combined, without whipping the mixture or creating a large volume.
- Add the honey and milk and beat again until you have a smooth mixture. Sift the flour and baking powder separately and gradually add them to the bowl.
- Mix only until no lumps of flour remain. The batter should be smooth and homogeneous, slightly thinner than a thick pancake batter. Let it rest for 15 minutes at room temperature to allow the flour to fully hydrate.
- While the dough rests, divide the anko into 8 portions of about 50g each. With slightly damp hands, form compact discs slightly smaller than the cavities of the mold. They don't need to be identical; they just need to be small enough to fit in the center without touching the sides.
- Heat the obanyaki mold slowly over low heat. The ideal temperature is around 175°C (350°F). Grease each cavity with a little oil and remove almost all the excess with kitchen paper. The coating should be very thin; if you leave too much oil, the outside will fry unevenly and the browning will be inconsistent.
- We transfer the batter to a pitcher with a spout for easier pouring. If using a four-cavity pan, fill two cavities about halfway and leave the other two empty. Cook for 2 minutes over low heat, until the edges begin to look matte while the center is still tender.
- Place a portion of anko in the center of each of the two bases and cook for another minute. The filling should be centered and surrounded by dough; do not press it against the bottom or sides.
- Pour the batter into the other two cavities, filling them about a third full, and cook for 2 minutes. These halves will be the lids. Their surface should still be moist and slightly sticky: if you let it set completely before joining them, it will be much harder to get a clean seal.
- Using a thin spatula or metal skewer, loosen a filled base, lift it, and place it anko-side down on one of the lids. Repeat with the second lid. The goal is not to flatten the pieces, but to align the edges while the lid dough still retains some moisture.
- Gently press around the perimeter and cook the sealed obanyaki for another 2 minutes over low heat. If the pan heats unevenly, you can rotate them or transfer them to a different cavity. They should be golden brown on both sides, with a cooked edge and no raw dough.
- We remove the first two obanyaki to a wire rack and repeat the same process with the remaining dough and anko until we have made eight. The rack allows steam to escape and helps to keep the slightly firm exterior. We let them cool for a few minutes before eating them because the filling retains quite a bit of heat.
Some sweets are filled after they're baked. Japanese obanyaki is the opposite: the filling goes in while the pastry is still cooking, and the two halves are joined together inside the mold. This simple assembly is what results in a round, sealed pastry with two golden sides, a sealed edge, and plenty of anko (red bean paste) in the center.
The batter resembles that of pancakes, but the goal isn't to create a high, airy crumb. The key here is a relatively thin layer that can support the filling without being heavy. The classic filling is anko tsubuan, a sweet azuki bean paste that retains some of the bean, resulting in a moist, dense, and textured interior. It's a very common filling in Japanese sweets and also appears in various mochi preparations.
The name varies considerably more than the recipe. Imagawayaki, obanyaki, and kaitenyaki all coexist in Japan, and their use differs by region. A survey of 4,849 people revealed significant differences between prefectures, so it's unwise to treat any one of these names as the only correct one. To further explore these types of dishes, our selection of Japanese cuisine includes many more sweet and savory recipes, each quite distinct from the others.
What remains the same is the cooking method: low heat, a little oil, and patience when closing the two halves. The specific mold makes the job much easier, but we'll look at a reasonable alternative later if you don't have one.