Dark Chocolate-Cherry Sourdough Bread
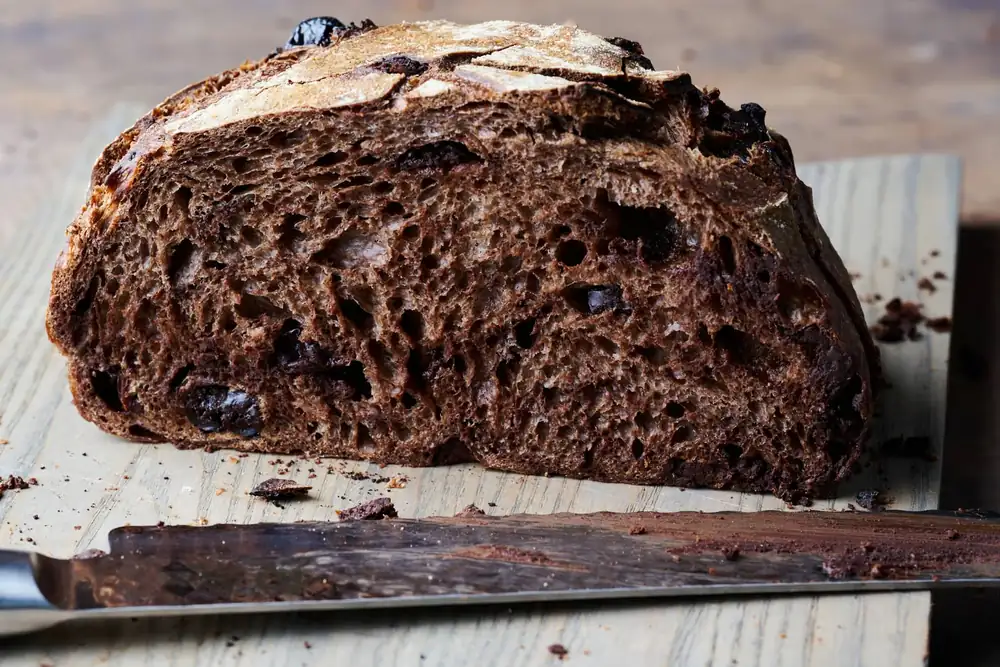
This rich, dark chocolate-cherry sourdough bread is deliciously menacing; like a chocolate bar, once unwrapped, it constantly demands attention. But before I started work on this recipe, I was skeptical.
- 42g white flour (about 11.5% protein)
- 42g whole wheat flour
- 84g water
- 8g ripe sourdough starter, 100% hydration
- 516g white bread flour (about 11.5% protein)
- 120g high-protein flour (about 12.7% protein)
- 78g whole wheat flour
- 159g dark chocolate chunks (or chips)
- 159g dried cherries
- 24g unsweetened cocoa powder
- 24g canola oil
- 16g superfine sugar (caster sugar)
- 474g water 1
- 40g water 2
- 14g fine sea salt
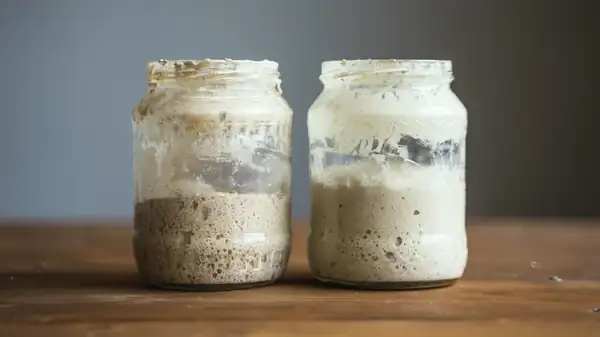
- (9:00 p.m.)In a small bowl or jar, mix the Levain ingredients. Cover the jar and keep it at a warm temperature for 12 hours.
- (8:00 a.m.)Add the oil to a medium saucepan over medium heat and heat until very warm. Add the cocoa powder and whisk continuously until the powder thickens. Remove from the heat and let cool.
- (8:30 a.m)In a mixing bowl, add the 516g white flour, 120g high-protein white flour, 78g whole wheat flour, and 474g water 1 and mix until no dry bits remain. Cover the bowl and let rest for 30-minutes.
- (9:00 a.m.)Add the sugar, salt, and levain, to the top of your dough already in the mixing bowl, and use a splash of water 2 (reserved water) to moisten. Mix thoroughly and if the dough feels like it can handle it, add the remainder of the water. Next, knead the dough for a few minutes either with the slap and fold technique or do folds in the bowl. For this dough, I did this for about 5 minutes until the dough begins to smooth out and become elastic. Pour the bloomed cocoa onto the dough and mix through by pinching and folding. When mixed, transfer the dough to a container for bulk fermentation and cover.
- (9:30 a.m. to 1:30 p.m.)This dough will need 3 sets of stretches and folds during bulk fermentation where the first set starts after 30 minutes into bulk fermentation and the subsequent sets are at 30-minute intervals. During the first set of stretches and folds, add the mixed together chocolate and cherries as you perform each stretch and fold. After the third set of stretches and folds, let the dough rest, covered, for the remainder of bulk fermentation.
- (1:30 p.m.)Lightly flour your work surface and scrape out your dough. Using your bench knife, divide the dough in half. Lightly shape each half into a round shape. Let the dough rest for 35 minutes, uncovered.
- (2:05 p.m.)Shape the dough into a round (boule), then place the dough in proofing baskets, seam side up.
- (2:15 p.m. to 9:00 a.m. the next day)Cover proofing baskets with reusable plastic and seal shut. Then, place both baskets into the refrigerator and proof overnight.
- (The next day, bake at 9:00 a.m.)Preheat your oven with a baking surface or combo cooker/Dutch oven inside to 450°F (230°C). I recommend baking this dough on a piece of parchment as the chocolate may melt out slightly. When the oven is preheated, remove your dough from the fridge, score it, and transfer it to the preheated baking surface or combo cooker. Bake for 20 minutes with steam. After this time, vent the steam in the oven or remove the lid (you can keep it in the oven or remove it) and continue to bake for 30 minutes longer. When done, the internal temperature should be around 204°F (95°C). Let the loaves cool for 2 hours on a wire rack before slicing.
Thankfully, I was wrong. While baking, irresistible nutty, earthy, and roasted coffee aromas swirl about, an eddy of enticing fragrances that constantly pull you to the kitchen. A compulsion quickly sets in to first check the oven, then the timer, then the oven again—restless for the loaf to finish and eager to finally indulge in that magical ambrosia. I can recall only a few recipes that elicit this feverish behavior during baking (my chocolate babka and cinnamon rolls qualify), and this bread may take the top seat in that category.
I started to develop this chocolate sourdough bread as a beautiful Valentine’s Day treat, but after testing it for weeks, I’ve found that it’s perfectly suitable for any time of the year. I mean, chocolate + cherries + bread—when isn’t that seasonally appropriate?
What Is Blooming Cocoa Powder?
You’ve probably run across recipes that call for blooming dried spices in a hot liquid (usually oil). Did you know that you can bloom cocoa powder too? As it does for spices, blooming intensifies the flavor of the chocolate significantly. Additionally, it means we can use less cocoa powder overall, eliminating the issue of excessive bitterness in the final loaf.
For this recipe, I chose to bloom the cocoa powder in neutral-flavored canola oil, transforming the two into a syrup-like liquid (similar in consistency to the barley malt slurry in my Sourdough Bagels). I then add this mixture to the dough at the end of mixing.
The canola oil itself is a boon to the bread: it brings a measure of tenderness and sheen to the crumb, making both the crumb and crust more tender.
Flour and Ingredient Selection
The majority of the flour in this dark chocolate-cherry sourdough bread is white flour, though I include a portion of whole wheat for increased fermentation activity and flavor. This whole wheat flour can be freshly milled, too, if you’d like to use your grain mill.
A small percentage of the white flour is high-protein white bread flour, which brings strength and added structure to the dough. If you don’t have any high-protein flour on hand, using all medium-protein flour or even all-purpose flour will work well, too; just keep an eye on the hydration of the dough, and if necessary, don’t add all the reserved water (water 2) in mixing.
I use dried and sweetened tart cherries, which are quite moist, but if yours are very dry and hard, soak them overnight while the levain ripens in a small measure of the mixing water (taken from Water 1 in the ingredients) to help rehydrate them.
Baking Schedule
This chocolate sourdough bread takes two days to make (not including the levain). The cold overnight proof gives the dough ample time to fermentation, thus increasing the final fermentation flavors and making for a more manageable dough to score before baking. To switch this to a direct bake (i.e. to bake it the same day it’s mixed), leave the dough out to proof on the counter for 2 to 3 hours until it passes the poke test (a finger poke springs slowly back).
If it’s cold right now where you’re baking, be sure to see my guide on how to bake sourdough bread in the winter for tips on how to keep this dough on its schedule.
Desired dough temperature: 78°F (25°C) (see my post on the importance of dough temperature).
1. Prepare the Levain – 9:00 p.m., the night before mixing
Mix the following ingredients for the levain in a jar and leave them covered at a warm temperature, 74-76°F (23-24°C), to ripen overnight.
2. Bloom the Cocoa Powder – 8:00 a.m., the day of mixing
Put the oil in a medium saucepan over medium heat and heat until very warm, 2 to 4 minutes. Add the cocoa powder and whisk continuously until the powder dissolves and the mixture becomes thick, about 3 to 4 minutes. Remove the pan from the heat and let cool.
3. Autolyse – 8:30 a.m.
This recipe uses the autolyse technique to increase the extensibility of the dough to make hand-mixing easier.
Mix the following ingredients in a large bowl until incorporated. Cover and let rest for 30 minutes.
4. Mix – 9:00 a.m.
I mixed and strengthened this dough by hand using the slap and fold technique, but you could use a KitchenAid stand mixer or a large spiral mixer.
Add the sugar, salt, and levain to the top of the autolyse dough, and use a splash of water to moisten it. Mix thoroughly. Add the remaining water if the dough feels like it can handle it. Next, mix and knead the dough for about 5 minutes until it smooths and becomes elastic.
Pour the bloomed cocoa onto the dough and mix it in by pinching and folding until it’s thoroughly incorporated. If you want the dough to be completely dark in color, mix the cocoa in well at this point, but if you’d like a more marbled sourdough bread look, mix it more gently and stop before it’s fully dispersed. Transfer the dough back to the bowl or to a container for bulk fermentation and cover.
5. Bulk Fermentation – 9:30 a.m. to 1:30 p.m. (4 hours)
At a warm room temperature, 74-76°F (23-24°C), bulk fermentation should take about 4 hours. If your kitchen is cooler, place your bulk container in a small home dough proofer, or extend the bulk fermentation time to give the dough more time to ferment. The dough is ready when it is smooth, puffy, and well-risen.
In a small bowl, mix the dried cherries and chocolate chunks.
This dough will require 3 sets of stretches and folds during bulk fermentation. After the first 30 minutes, but before you give your dough its first set of stretches and folds, spread about one-quarter of the inclusions over the top of the dough. Grab the side of the dough farthest from you, and stretch it over it to the other side. Next, spread on another one-quarter of the inclusions to the new top. Rotate the bowl 180-degrees and perform another stretch and fold. Next, spread on another one-quarter of the inclusions, rotate the bowl 90-degrees, and do another stretch and fold. Finally, spread on the last of the inclusions, turn the bowl 180-degrees, and do one last stretch and fold. The dough should be neatly folded up in the bowl.
Perform 2 more sets of stretches and folds at 30-minute intervals. Then let the dough rest, covered, for the remainder of bulk fermentation.
6. Divide and Preshape – 1:30 p.m.
After 4 hours, the dough should be well-risen in the bulk fermentation container and be puffy to the touch. This is a relatively strong dough at this point in the process and doesn’t need a heavy hand when preshaping.
Fill a small bowl with water and place it next to your work surface. Scrape the dough onto a clean counter. Divide the dough into 2 equal pieces. Then, shape each piece into a loose round.
To reduce burning on the exterior, if you see any pieces of chocolate or cherries hanging onto the top or sides of the preshaped rounds, pluck them out and put them under the dough (which will end up being the inside of the loaf when you bake).
Let the dough rest, uncovered, for 35 minutes.
7. Shape – 2:05 p.m.
Note: While this dough has a significant amount of chocolate in it, I didn’t find that it discolored my proofing baskets. In early testing, I lined my baskets with cloth liners but stopped using them in later tests. Use liners if you’re worried about your baskets.
Flour the top of each preshaped round and your work surface. Using your bench knife, flip one round over to the floured area. Using floured hands, shape the round into a boule shape. Transfer the shaped dough into a proofing basket, seam side up.
Repeat for the other preshaped round.
8. Proof – 2:15 p.m. to 9:00 a.m.
Cover the baskets with a large, reusable plastic bag and seal shut. Then, place the baskets into your refrigerator to proof overnight.
9. Bake – 9:00 a.m., the next day
Note: I recommend baking this dough on parchment paper because some chocolate may melt out during baking.
Place an oven rack in the bottom third of the oven. Put a Dutch oven, combo cooker, Challenger bread pan, or baking stone/steel on the rack. Preheat the oven to 450°F (230°C) for 30 minutes.
I baked these loaves in my Challenger bread pan, but you could also follow my guide to steaming an oven for baking bread.
Slide the dough into the oven. Steam the oven: either cover the Dutch oven or pour ice into the preheated pan at the bottom of the oven. Bake for 20 minutes. Vent the oven of steam: either uncover the Dutch oven and remove the lid or remove the steaming pans. Continue to bake for 30 minutes more. When done, the loaf should have an internal temperature of around 204°F (95°C), and the crust should be deeply colored.
Let the loaves cool on a wire rack for 1 to 2 hours before slicing with your favorite bread knife. See my post on the best way to store bread to keep it fresh for a week or longer.
Description
A loaf of sinfully delicious sourdough bread with dark chocolate and dried sweet-tart cherries. This bread has a robust chocolate flavor and pops of sweetness from the dried cherries.