Homemade Hazelnut Chocolate Spread
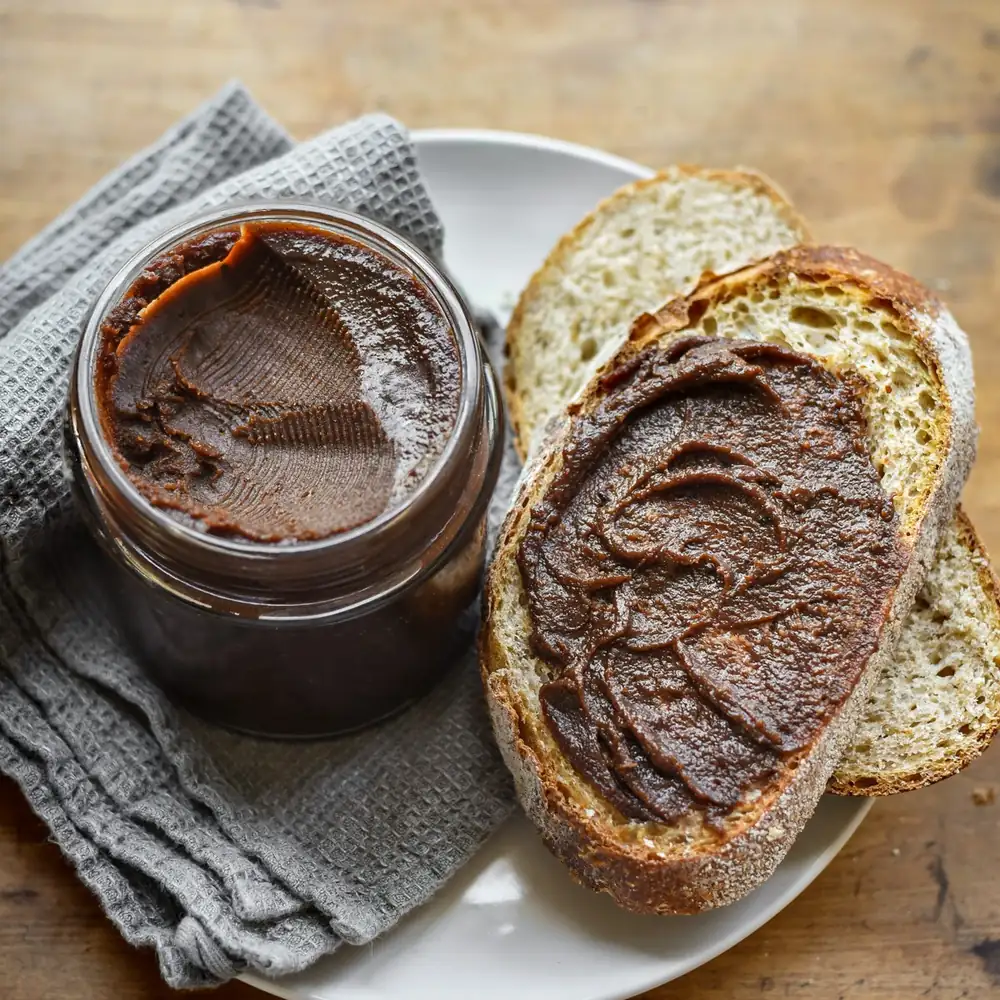
Always a front-runner to garnish crêpes or for being smeared over sliced baguettes, Hazelnut Chocolate Spread is a definite star of the French breakfast table.
Perfectly creamy, but less sweet and more robust in hazelnut flavor than most store-bought brands, this homemade hazelnut chocolate spread recipe focuses on two star ingredients – roasted hazelnuts and milk chocolate – for a taste and texture that’s as addictive as can be. For the making of Homemade Hazelnut Chocolate Spread, you first need to make hazelnut butter – to which melted chocolate and cream are then added.
Making hazelnut butter is a quick and simple process, achieved by blending roasted hazelnuts in a food processor/blender until it turns into “butter” – and that’s it. This can often be more cost-efficient than buying a jar from the store, especially if you buy the hazelnuts in bulk. That being said, you can also use a jar of already-made hazelnut butter if you have one on hand.
Simply make sure it is organic hazelnut butter, made from only one ingredient: roasted hazelnuts. How to make hazelnut butter? Making hazelnut butter starts with roasted hazelnuts, which are then blended to a smooth, spreadable consistency (“butter”).
Here is how it’s done in two easy steps.
- Roasting hazelnuts
Pre-heat your oven to 350°F (180°C) with a rack in the middle. Line up a baking sheet with parchment paper and spread the hazelnuts on it in an even layer.
Bake the hazelnuts for 15 minutes, until skins are blistered. Remove the baking sheet from the oven and let the hazelnuts cool completely on the baking sheet. Once cool, transfer the hazelnuts, one handful at a time, into a kitchen cloth.
Close the kitchen cloth and rub/scrunch between your hands for about 1 minute. The friction will help most of the hazelnut skins to fall off.
Transfer the “cleaned” hazelnuts to a bowl. Once roasted, hazelnuts can be kept for up to 12 months in an airtight container in the refrigerator or freezer.
- Blending hazelnuts
Transfer the roasted hazelnuts to a high-speed blender or food processor. Blend on high speed until smooth – in intervals, so the nuts and machine don’t overheat.
As you blend, the nuts will get stuck to the sides of the work bowl. Scrape down the bowl with a rubber spatula once in a while. The longer you blend, the smoother the hazelnut butter will be. 4-5 minutes will give you a thick spreadable butter (as pictured here) / 12-15 minutes will give you a smooth, more liquidy butter (note: the times will vary depending on the appliance you’re using).
Once made, use the hazelnut butter immediately to make this Homemade Hazelnut Chocolate Spread or store it in a jar or airtight container for up to 3 months in the fridge. Cooking notes:
- This recipe requires the use of a high-speed blender or food processor.
- This recipe was developed with the use of milk chocolate, to create a creamier/spreadable texture. I also found milk chocolate lends the best taste. Make sure you choose a good quality milk chocolate bar or callets – not chocolate chips. Chocolate chips often include stabilizers such a soy lecithin added to them, which raise their melting temperature so the chips keep their shape once baked. So a melted baking bar yields a smoother and more malleable end result. Choose a milk chocolate with at least 30% cacao solids. I personally recommend Callebaut and Valrhona brands.
- This recipe gives you enough spread to fill a 1.5cups / 350ml jar. You can double the quantities to make more.
How to store this Homemade Hazelnut Chocolate Spread? After making the spread and letting it cool to room temperature, store it in the refrigerator.
- In the refrigerator: store it in an airtight container/jar in the fridge for up to 3 weeks. I recommend you take it out of the fridge at least 15 minutes before eating it, to allow the texture to soften a bit.
- Not in the freezer: I do not recommend freezing this spread.
I hope you’ll love this Homemade Hazelnut Chocolate Spread recipe as much as I do! If you have any questions, feel free to leave a comment. Note about this recipe:
I experimented to test and develop a homemade hazelnut chocolate I was very happy about – and this is the one. I played around with hazelnut vs. chocolate ratios, tried different types of chocolate (ie. dark chocolate), different fats (ie. hazelnut oil, powdered milk), different sugars (ie. honey, maple syrup), etc. In the end, I found this final recipe to be my best result, both in taste and texture.
It isn’t dairy-free, low-sugar or anything as such (I feel this spread is definitely “a treat”), but this is by far the BEST version, in my opinion! There are hundreds of homemade hazelnut chocolate spread recipes out there… so if you are looking for a dairy-free, low-sugar or “healthier” spread, I am certain you will find it elsewhere.
- Who: Method Skip
- Percentages: 35%
- Figures: 35%