Sweet tartlet shells (individual tart crusts)
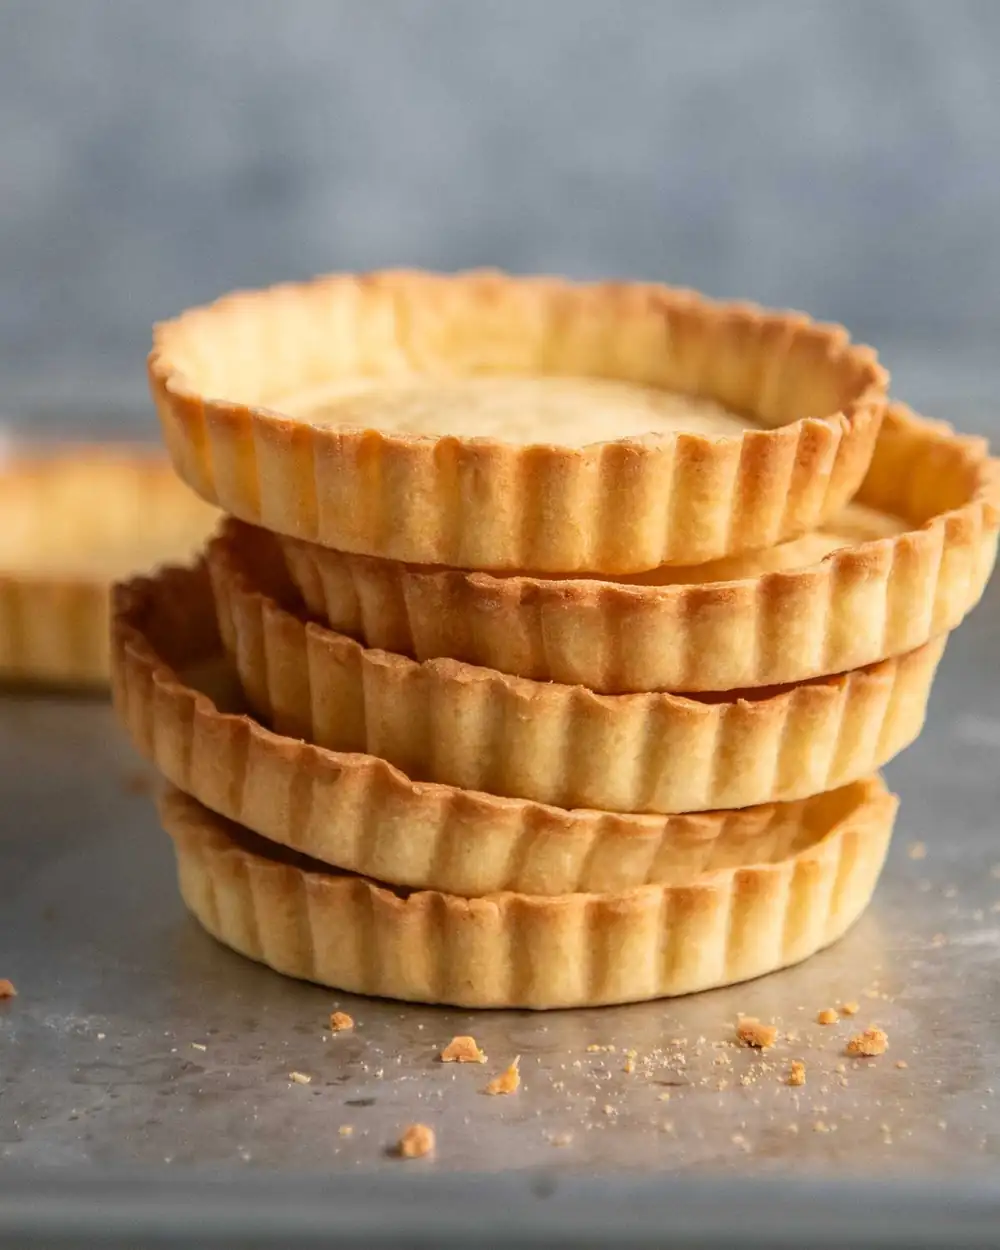
This is a method for individual sweet tartlet shells made with pâte sucrée , the classic pastry used by French pâtisseries for tarts.
- 1 1/2 cups plain flour (all-purpose flour)
- 1/2 cup soft icing sugar (powdered sugar) (, sifted (Note 1))
- 2 1/2 tbsp almond meal (ground almonds) (, not almond flour (Note 2))
- 1/4 tsp cooking salt / kosher salt
- 100g / 7 tbsp unsalted butter (, unsalted, softened, cut into 1cm / 0.4" cubes)
- 1 large egg (, at room temperature (~50 - 55g/2 oz) (Note 3))
- Mix dry ingredients, rub in butter then egg (or use food processor). Form disc, fridge 30 min. Portion into 6 balls*, roll out 15 cm / 6.5" round (~3mm / 1/8" thick), line 6 tartlet tins, trim excess. Fridge 30 min. Blind bake 12 min at 200°C / 390°F (180°C fan) with weights + 5 min uncovered for par-baked. * For mini tins or muffin tin, roll out single large one and press out circles. Gather scraps and repeat.
- By hand option - Mix together flour, icing sugar, salt and almond meal in a bowl. Add butter and use your fingertips to rub it in until it resembles breadcrumbs. Add egg, mix with a rubber spatula until it becomes too hard to stir anymore, then use your hands to bring it together into a dough.
- Food processor (30 sec) - Using the standard metal S blade, pulse the flour, icing sugar, salt and almond meal once just to combine. Add butter and pulse 3 to 4 times until it resembles breadcrumbs. Add egg and blitz for 15 to 20 seconds until it comes together into a dough.
- Fridge 30 min - Turn dough out from the bowl or food processor onto a work surface. Knead lightly just to bring together into a smooth ball. Flatten into a 2cm / 0.8" thick disc. Wrap with cling wrap and refrigerate for 30 minutes.
- Divide dough (for larger tartlet tins) - Cut the disc into 6 equal portions, or however many tartlet tins you are using, then roll into balls. (If using a muffin tin or lots of mini tart tins, don't portion, roll out one big sheet, press circles out and press into tin. See Note 4)
- Roll each ball out into a 15 cm / 6.5" round (~3mm / 1/8" thick).
- Line and trim - Press pastry into 6 tartlet tins (12cm / 4.7"), taking care not to stretch the dough as this causes shrinkage during baking. Roll the rolling pin over the tartlet tin to trim excess dough. (No need to grease the tins even if they are not non-stick ones, the butter in the pastry essentially self-greases the tins - as reader Ali so succinctly explained!).
- Prick the base of the pastry 10 times with a fork. Not all the way through - just make a light prick on the surface. (Do less pricks for smaller tarts).
- Refrigerate 30 minutes - Put the pastry in the tart tin for 30 minutes. (Extra insurance policy to avoid shrinkage and walls sliding down).
- Preheat oven to 200°C / 390°F (180°C fan-forced).
- Baking beads - Cut or tear baking paper into pieces about 50% larger than the tart shells. Scrunch the paper in your fist then unravel, smooth out and fit into the tartlet tins (scrunching makes it fit in more easily into the corners). Fill with baking beads (or dry raw rice or beans).
- Park-bake or fully baked? Par-bake if the tartlet shell will be baked again after filling (eg. almond cream / frangipane like Raspberry Tartlets). Fully bake if they will not be baked again (eg filling with pastry cream or whipped cream).
- Par-baked (12 + 5 min) - Bake 12 minutes. Use paper overhang to remove the beads, then bake uncovered for 5 minutes. Pastry should pale golden on the base and light golden on the edges. It will go golden when the filled pastry is baked.
- Fully baked (14 + 5 min) - Bake 15 minutes, remove beads, then bake 5 minutes uncovered. The base should be light golden and the edges should be golden.
- Cool and fill - Fully cool in the tart tins before filling and baking again if filling needs to be cooked (like Raspberry Tartlets).
- Storage - Or keep unfilled in an airtight container for up to 3 days.
“thick). Line and trim – Press pastry into 6 tartlet tins (12cm / 4.7”
It’s my go-to crust for sweet tarts – crisper, more delicate and easier to work with than regular shortcrust . This firms up the butter in the dough which is what makes the crust nice and flake. 2. roll-out and line tartlet tins The ball-rolling and rolling-out method set out in this section is a very efficient way to line tartlet tins around 12 cm / 4.7″ in diameter (the method makes 6), close to the size most commonly used in pâtisseries.
This prevents the base from puffing up, which it otherwise would in the 2nd bake after the baking beads are removed. Cold butter = lovely crispy crumbly pastry! 3. baking The bake times in the method are for the pictured tartlet tins.
If you are making smaller ones or mini ones using a muffin tin, you can reduce the bake time to 12 minutes with the baking beads and 2 minutes uncovered. Crumple the baking paper – For each tartlet, cut a piece of baking paper about 50% larger than the tart tin. If the tarts won’t be baked again (eg. filled with custard, pastry cream, whipped cream ), bake for 14 minutes which will fully cook the tart base all the way through (whereas for tarts that will be filled and baked again, the base can be a bit undercooked as it will finish cooking through with the filling).
Bake 2 – Then return the uncovered tart shells to the oven and bake for a further 5 minutes if the tarts will be filled with something that needs to be baked. You can in addition store the unfilled tarts in an airtight container for 3 days and they will stay fully crisp and fresh!
Notes 4 and 5 in the recipe card gives instructions on how to use a muffin tin. This is a method for individual sweet tartlet shells made with pâte sucrée, the classic pastry dough used by French pâtisseries for tart crusts.
Blind bake 12 min at 200°C / 390°F (180°C fan) with weights + 5 min uncovered for par-baked. * For mini tins or muffin tin, roll out single large one and press out circles. Add egg and blitz for 15 to 20 seconds until it comes together into a dough.
Rolling out: Divide dough (for larger tartlet tins) – Cut the disc into 6 equal portions, or that said many tartlet tins you are using, then roll into balls. (If using a muffin tin or lots of mini tart tins, don't portion, roll out one big sheet, press circles out and press into tin. Line and trim – Press pastry into 6 tartlet tins (12cm / 4.7"), taking care not to stretch the dough as this causes shrinkage during baking. Refrigerate 30 minutes – Put the pastry in the tart tin for 30 minutes. (Extra insurance policy to avoid shrinkage and walls sliding down).
Use paper overhang to remove the beads, then bake uncovered for 5 minutes. Tart tins and rolling out – If using larger individual tartlet tins like the 6 x 12cm / 4.7″ ones I have, I find the most efficient way to roll and line the tins is to portion the dough into individual balls.
But if you’re making more than, say, 8 smaller tartlets (smaller tins or muffin tin), it is more efficient for you to roll out one big sheet then cut rings out to line your tins. Baking for muffin tin and smaller tartlet tins – Bake for 12 minutes with weights per method but only 2 minutes uncovered, just to make it golden.
Cut then leave for 20 – 30 min (or longer if required) to soften slightly so you can roll balls and roll it out.