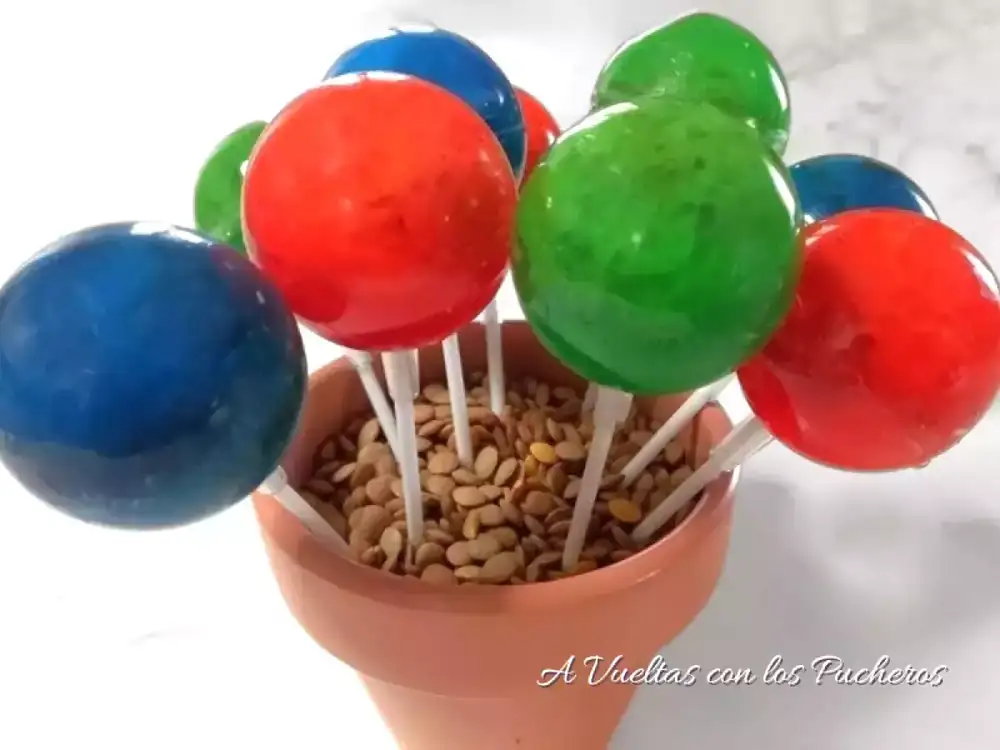
Caprese tortilla lollipops, microwaveable
Once a year, for the anniversary of the perfect tortilla club, I try something crazy. This time it consisted of making some caprese tortilla lollipops, which I hope you like and are a little surprised by. I used some cherry tomatoes and mozzarella balls that I had left over after making some skewers.
Ingredients · Servings 9
- 2 eggs
- 100ml nata
- 100g of cream cheese
- 3 tomates cherry
- 4 mozzarella balls
- fresh basil
- 1 pinch of ground black pepper
- 5 grams of baking powder
- 1 pinch of salt
- unflavored powdered gelatin (as directed on the package)
- water
- food coloring gel
Method · 20 min
- Start by beating the eggs with the cream cheese, using a mixer or by hand (always with a whisk), until well combined. Then add the baking powder, cream, salt, and chopped basil, and whisk again. Fill the mold three-quarters full, cover with the other half, and microwave on full power (900 watts) for 30-40 seconds, just enough for it to set slightly.
- Crush 4 mozzarella balls and 3 cherry tomatoes and add a pinch of ground black pepper, put a teaspoon of this paste on top of the egg in the mold, fill with the mixture we prepared at the beginning to the edge of each hole, cover again and put it in the microwave this time for 1 minute, if it is still too liquid cook it for a few more seconds.
- Take it out of the oven and refill it, because it will have shrunk again, with the egg, cheese and cream mixture, put it back in the microwave for the last time, cook for 2 minutes and then continue in 30-second bursts until the egg overflows over the edges of the mold or through the holes in the lid, that is the sign that the yeast has done its job and the tortilla has risen, cook for 15 more seconds to make sure that it sets and let it rest a little inside the oven before uncovering, this whole process will take between 4 and 5 minutes maximum.
- Prepare the gelatin, divide it into three equal parts, and add the chosen coloring to each. You'll need a mold larger than the tortilla balls, otherwise you won't be able to create a gelatin layer that covers them properly. I got some hollow plastic balls that worked very well, but a couple of ice cube trays will also work, as long as they're soft, preferably silicone. With rigid ones, it's almost impossible to unmold and get the balls out whole. Whether you use one or the other, grease the mold with a piece of kitchen paper moistened with oil so you can unmold them more easily later.
- Pour a small amount of gelatin into the bottom of the mold and refrigerate until it sets slightly. This will create a base for the balls to fit into after trimming off any excess gelatin with scissors. To save time, place the mold in the freezer for 5 or 6 minutes. Remove the mold and place the lollipops in the center, pressing gently to secure them. Fill the mold with more gelatin to the top, refrigerate again, and this time leave it long enough for the gelatin to set completely.
- Fill the other ice cube tray or the other half of the sphere with gelatin and place the set one inside, fitting it in. It will likely overflow, but make sure you cover the entire tortilla ball. Refrigerate until completely set, joining the two halves. Don't rush it; you need to ensure it's firmly attached. Unmold carefully, as the gelatin is delicate. To ensure it comes out whole, dip the mold in warm water for a few seconds, first on one side and then the other. The pieces will then release easily with a gentle press.
- They are suitable for diabetics and celiacs; for the latter, carefully check the labels of the gelatin and colorings.