13 errores que podrías estar cometiendo al preparar tu salsa casera
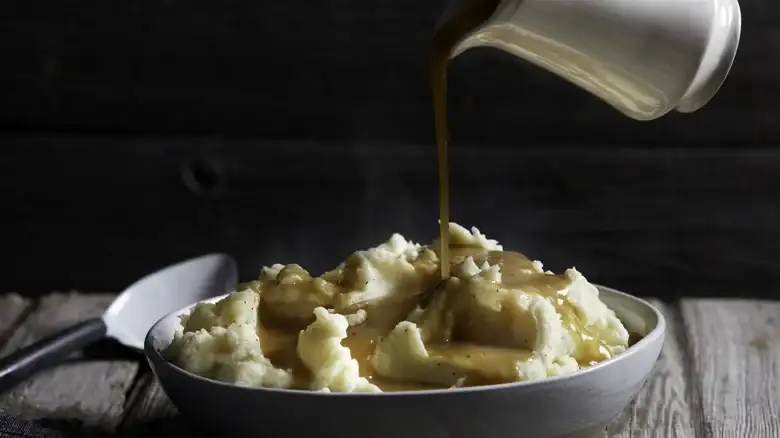
La salsa gravy es prácticamente mágica. Es el acompañamiento perfecto para comidas festivas y carnes asadas, además de aportar el sabor umami ideal a las sopas. (No entiendo por qué no es una de las salsas madre francesas). La comemos con patatas fritas, filetes, albóndigas, pasteles, galletas e incluso sándwiches.
Gravy is essentially magical. It's a perfect accompaniment to festive meals and roasted meats, as well as providing the perfect rich, umami flavor for soups . (Why it isn't one of the French mother sauces is beyond this writer.) We eat it with fries, steaks, dumplings, pies, biscuits, and even sandwiches.
Plus, it's multinational. While gravy is American through and through, it also has roots in European cuisine, has permeated Latin cooking (hello, Tex Mex gravy), and smothers delicious Indian dishes in the form of curry gravy. If you just left your computer and took off running for the nearest Indian restaurant, well, that seems about right.
At its most basic, though, gravy is pretty similar across the board: take a fragrant liquid, often pan drippings, and thicken it in various ways. Then pour it liberally over meats, veggies, and breads — or eat by the spoon. Or at least, that's the goal. Sadly, perfect gravy isn't as easy to achieve as it is to fantasize about, and there are ever so many ways it can turn out wrong. Lumpy? Curdled? Burnt? Bitter? Flavorless? Oversalted? Too thin? Too thick? Too greasy? With the amount that can go sideways, it's a wonder anyone manages to make good gravy (snerk). But before you lose heart, wait! Because it can be done: You just have to know which homemade gravy mistakes to avoid.
Using under-roasted drippings
Drippings that haven't been roasted long enough lack flavor and won't give your gravy that deep color we associate with a good one. If your drippings don't roast long enough to caramelize, then they will not undergo the Maillard reaction, the chemical process that meat undergoes when it's cooked and that is responsible for the deep golden-brown color we associate with, say, a nice crust on your burger. The Maillard reaction also gives drippings their amazing flavor, so you've got to make sure they roast long enough to brown well. Beneath that layer of fat and juices, make sure there's a crust of browned bits along the bottom of the pan. Even more importantly, make sure not to leave that crust behind. "The best way to get drippings off the pan is to deglaze it immediately while it's still warm," says Julia Chebotar, Food Network's "Chopped" Champion and the brain
Choosing the wrong recipe
When hunting down a recipe, you've got no shortage of options. After all, says Jessie-Sierra Ross, author of " Seasons Around the Table," "Gravy has a long history in the culinary world, going back in written texts as far as the 14 th century. Historical gravies were probably more like a thin au-jus than the thickened style of 'turkey gravy' we enjoy these days at Thanksgiving, but it was an economical and tasty way to use all of the fats, juices, and drippings from the cooked proteins." That's still the basic purpose of gravy, recipes for which vary widely, depending on where in the United States you live. "The South has a particularly large variety," Ross says, sharing examples such as sawmill gravy, which relies on pork drippings, flour, and milk; or red-eye gravy, which calls for fried ham drippings, butter, seasonings, and — if you'll believe it — strong
Adding cornstarch or flour straight to the sauce
Thickening is, like, a big deal when it comes to gravy. "One of the ways you can take a thin pan sauce and turn it into a delicious gravy is using a thickener," Jessie-Sierra Ross says. "A slurry of flour or cornstarch mixed with a small amount of water will do the trick." Once you've made your slurry, all you have to do is add it to your base (e.g., drippings or stock), simmer, and stir until it creates a velvety sauce. It's the slurry part that often trips people up, Julia Chebotar says. Folks add the flour or cornstarch directly to the liquid without creating a slurry, which leads to clumps. This is one of the biggest homemade gravy mistakes, because then you have to sieve it to get all those clumps back out. Use the slurry and stir it in slowly while whisking, and you can avoid those clumps. Even better, Chebotar advises, make a roux, a mixture of fat
Not cooking your roux long enough
Speaking of roux, if you're not using one for your gravy base, it's time to mend your ways immediately. Even if you are, though, you've got to make it right. Undercooking roux is another of the most tragic homemade gravy mistakes, because when you skimp on browning, you rob yourself of flavor. Moreover, you compromise the texture. "Undercooking the paste leads to lumps and a raw flour taste in the gravy," Jessie-Sierra Ross says. Instead, you should first melt your fat, usually butter, although you can also use the fat from the top of your drippings. Once it's hot and bubbling, mix in your flour slowly using a sturdy whisk, like this OXO Good Grips 11-Inch Balloon Whisk. (Or if you have nonstick pans and are worried about the surface, you might want to get a nice set of Walfos silicone whisks.) Make a thick paste, adding more flour as necessary, then stir constant
Adding too much thickener
Thick gravy? Yes, please. Thick enough to stand a spork up in? No, thank you to that, which is another of the most common homemade gravy mistakes. (Also, why are you using a spork, weirdo?) Too much flour or cornstarch will lead to gravy that is gelatinous and even gummy rather than smooth and glossy. When you are hoping for something lovely to pour over meat or veggies, that can be disappointing indeed. "Remember," cautions Julia Chebotar, "you can always add more, but it's tough to fix overly thick gravy." If you have added too much thickener, however, all is not lost. Just heat it back up on the stove gently (watching out for the bottom, which will burn more easily when thick). When it's hot, add broth a little bit at a time to thin it out. The final result should coat the back of a spoon but not stick to it. Keep in mind, too, that gravy will thicken
Adding too much dairy
Dairy has a place in gravy, but like any other ingredient, too much of it can go from delicious to overpowering quickly: Homemade Gravy Mistakes 101. Plus, since milk makes the dishes it's in milder, if you add too much milk or cream, you downplay the rich flavors of the meat drippings. In general, when most folks use the term "gravy," they mean the darker, meat-forward kind made with drippings. (If you Google the word on its own, classic meat gravy comprises the majority of first-page results.) This kind of gravy (such as the kind you'd have at Thanksgiving or the winter holidays) doesn't require any dairy at all if you choose to make your roux from the drippings themselves or from the fat skimmed off the top. Some cooks choose to start their roux with butter, which is delicious, but that's the most you should add to a classic gravy... milk need not apply. Yet
Forgetting to pour the fat off the drippings
Now, fat is delicious, which is why we all love adding butter to gravy. However, when making this, you want to add the fat as a base, not later on. If you forget to pour the fat off your drippings, then you end up with too much of it, resulting in gravy that is either too greasy or that straight-up has fat floating on the surface. "A bit of fat is ok to include in your sauces, but most of that greasy layer needs to be removed before you can make a sauce," Julia Chebotar says. While the rendered fat and drippings from a whole turkey or a steak are packed with flavor, she says, you must be judicious about how much you use, so the first step is to separate it from the juices and browned bits. "One of the easiest ways to separate the fat from the drippings is to skim it off," she explains. "Carefully pour the pan drippings into a glass measuring cup or small mixing bowl a
Not simmering gravy long enough
There are basically two effective ways to thicken gravy: adding thickening agents or simmering it for longer to evaporate liquid. You should have already done the first, but the second is just as important. If you don't simmer your gravy long enough, then it won't really be gravy. While there's a place for au jus in this world, it is not the same, so eliminate this from your list of homemade gravy mistakes right now. "Simmering gravy allows the starch to fully activate and eliminates any raw flour taste," Julia Chebotar explains. "If you skip this step, your gravy may taste flat, grainy, or too thin. Low and slow is the key to a velvety, rich consistency." Jessie-Sierra Ross agrees. "Gravies are essentially sauce reductions, and the flavors become more concentrated as the liquid evaporates," she says. Therefore, a gravy needs time over the heat, not only for the
Stirring intermittently or leaving gravy unattended
Sometimes, your head is on fire or you just need to hurry, and at times like that, you might want to avoid making gravy altogether. The thing is, leaving gravy unattended gives it time to burn, which it does quite quickly. "Gravy requires constant stirring to prevent scorching, especially if you've used flour or cornstarch as a thickener," Julia Chebotar says. "Its texture can also change quickly — in just a few minutes, it can go from perfectly silky to lumpy or overly thick." Your best bet, she says, is to treat it like a soufflé. "Give it your full attention, and it will reward you." Once your gravy is done, of course, you can safely walk away, as long as you turn it down to low heat — no more simmering. When her gravy is done and she wants to keep it warm without paying attention to it, Jessie-Sierra Ross nests the pot into a cast iron pan. This distributes the
Not adding enough flavor
Next up on our list of homemade gravy mistakes is underseasoning. While meat drippings carry plenty of their own rich, umami flavor, you still need salt, spices, and herbs to complement those flavors, or your sauce will be bland. "Underseasoning occurs when people forget how concentrated the drippings can be," Julia Chebotar says, pointing out that once you spread those drippings out by using stock or another liquid, that umami taste will have to go much further. "A poorly seasoned gravy is almost as bad as a lumpy gravy in my book!" Jessie-Sierra Ross declares. She recommends seasoning your meat well, for starters, because that effort towards flavor will transmit to the drippings, and thus to your sauce. She also starts her gravy with an aromatic base: "I like to use about 2 tablespoons of finely diced carrots, celery, and shallot, as well as fresh herbs like rose
Overseasoning with salt or spices
"Overseasoning often results from adding salt too early," says Julia Chebotar. When you throw in your salt right away, then reduce that gravy, the flavor intensifies, and you're often left with a concentrated sodium bomb. To avoid this, season in layers. "Start light with salt and pepper," she says. "Using fresh herbs or aromatics like garlic or onion can also add depth without relying solely on salt." It's worth remembering that salt is not a replacement for herbs and spices, or for properly roasting your drippings until they caramelize. Try to build flavor from the beginning rather than just salting the heck out of your gravy. And if you make a mirepoix before adding your drippings, Jessie-Sierra Ross says, hold off on the rest of your seasonings until your gravy is fully reduced. As with thickener, "You can always add more salt to taste, but it's much hard
Storing gravy improperly
Improper storage is one of the most serious homemade gravy mistakes. It has bearing both on flavor and safety, because it can increase the chances of bacterial breeding. You should always keep gravy in an airtight container. (These FineDine glass storage containers with lids, for example, will do the trick.) Typically, you should also store sauces separately from other foods, since different consistencies and textures can impact the overall quality of the food for later meals. Temperature also matters. "Many people store gravy in a container without cooling it properly, which can lead to food safety issues," Julia Chebotar says. "Always cool your gravy quickly by dividing it into shallow containers or stirring it over an ice bath before refrigerating." Lastly, make sure you reheat it properly when you take it out of storage. "Gravy thickens as it cools," Chebot
Keeping it in the fridge too long
Don't leave your gravy in the fridge too long, because you risk it spoiling or just developing off flavors. "Leftover gravy is only good for about three days in the refrigerator," Jessie-Sierra Ross advises, "so freezing is a great way to store it for future use." Believe it or not, you can freeze gravy in ice cube trays, as long as the gravy doesn't contain cream. Silicone trays are a great choice because they allow you to pop the cubes out easily after you've frozen them, so they don't have to take up space in the trays. You can store them in freezer bags, where they will last four to six months. If you don't feel like going to the effort, then simply cool your gravy until you can safely add it to the freezer bags, and lay it flat in your freezer so it hardens into a neat, stackable block.