Soy-Free Tofu (Made From Fava Beans!)
¡Aprende a preparar tofu sin soja a partir de habas! Con solo dos ingredientes —habas y nigari— se cuaja igual que el tofu tradicional. Tiene una textura firme y fácil de cortar, similar al tofu de soja, por lo que es perfecto para freír, hornear o marinar.
- 2 and 1/2 cups dehulled, split fava beans
- 12 cups water
- 1 tsp nigari flakes
- Soak the fava beans. Add the beans to a large mixing bowl and cover them with water. Let them soak overnight at room temperature.
- Rinse and drain the beans. Rinse the beans 3-4 times under cold water or until the water runs almost clear. Drain them well.
- Blend them. Transfer about half of the soaked beans to a blender and pour in 6 cups of water. Blend for about 30 seconds. Note: I blend the beans in two batches, as 12 cups of water don't fit in my blender.
- Strain the milk. Place a nut milk bag over a large glass mixing bowl. Next, pour the blended mixture into a nut milk bag. Use your hands to squeeze the bag and extract as much liquid as possible. Discard the pulp.
- Repeat. Transfer the remaining beans to a blender and add the remaining 6 cups of water. Blend again for 30 seconds and strain the milk using the same nut milk bag.
- Let the milk sit. Next, cover the bowl of milk with plastic wrap and let it sit undisturbed for about 2 hours. This step allows the starch to settle at the bottom of the bowl.
- Scoop out the milk. Once you can see the starch at the bottom of the bowl, use a measuring cup or a ladle to scoop out the milk and transfer it to a large pot or saucepan (I use my Instant Pot liner). Be careful: You only want to scoop out the milk, leaving the starch in the bowl.
- Bring to a boil. Bring the milk to a boil, then reduce the heat and simmer for 8-10 minutes, stirring constantly.
- Let it cool. Remove the pot from the heat and allow the milk to cool down to 167°F (75°C). I highly recommend using a kitchen thermometer for this step.
- Prepare the nigari. In the meantime, add the nigari flakes to a small bowl. Pour in 1/4 cup of warm water (at about 140°F / 60°C) and stir until the nigari is completely dissolved.
- Add the coagulant. Once the milk has reached the recommended temperature, slowly pour in the dissolved nigari while stirring. Gently stir a few more times using a wooden spoon or spatula to distribute the coagulant.
- Let it curdle. Allow the milk to curdle for 20-25 minutes. Do not stir during this step. The milk will separate into curds and whey.
- Prepare your tofu press. Slightly wet the cheesecloth and arrange it in your tofu press. Place the press inside a large baking dish so the whey can drain.
- Transfer to the press. Using a fine-mesh sieve, scoop out the curds and transfer them to the tofu press. Fold the cheesecloth over the curds.
- Press until the curds form a block. Place the top lid over the cheesecloth. Then, place three 15-ounce cans on top of the lid. Leave the tofu in the press for about 2 hours.Remove the lid and check your tofu. If it's not firm enough for your liking, press it for another 2 hours. Your tofu is now ready!
- Store the fava bean tofu in the refrigerator for up to 5 days.
Learn how to make soy-free tofu from fava beans! Made with just two ingredients – fava beans and nigari – it curdles just like traditional tofu! It has a firm, sliceable texture similar to soy tofu, making it perfect for frying, baking, or marinating. If you’ve never made tofu before, don’t worry, I walk you through the whole process step-by-step!
Did you know that soy-free tofu is a thing?!
I didn’t either! Until Julie, a reader, recently introduced me to Big Mountain Foods, a company making tofu entirely from fava beans. As soon as I heard about it, I was so excited to give it a try!
After a few failed tests, I finally figured it out! It’s actually surprising how well fava beans work for making tofu. The process is very similar to making traditional tofu: soak the beans, blend them with water, strain the milk, and coagulate it with nigari.
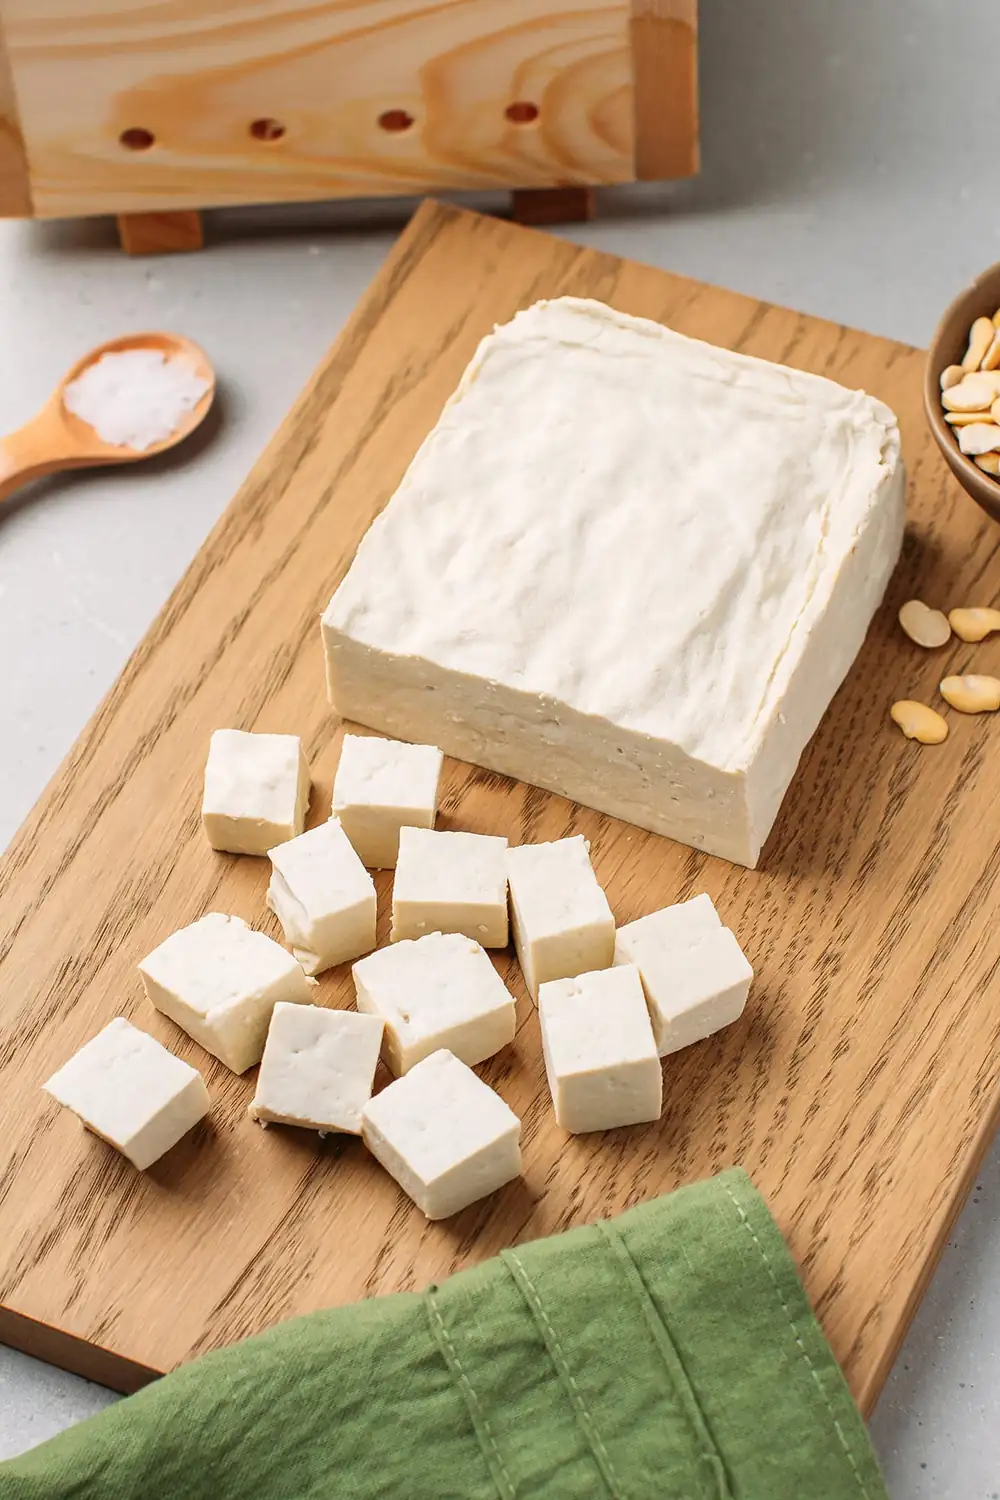
And yes, this recipe is accessible to everyone, even if you’ve never made tofu before! All you need is two ingredients: fava beans and nigari. The end result is a loaf of tofu that’s firm, slices cleanly, and is high in protein.
⭐️ Why You Should Try It
- Same texture as soy tofu. Forget tofu imposters like chickpea tofu or red lentil tofu, which barely qualify as tofu. This fava bean tofu is made using the same traditional technique as soy tofu, which gives it a texture that’s incredibly close to the original!
- A soy-free alternative to regular tofu. Whether you are soy intolerant or simply want to vary your protein sources, this tofu is a great alternative.
- Simple and cheaper than store-bought. The whole process is very simple, even for tofu beginners. And when it comes to the price difference, you won’t believe it! I bought 1kg of fava beans for $4.50, and based on my calculations, it costs around $2.25 to make one large 17-ounce (480 g) loaf of tofu, making it 73% cheaper than the store-bought version!
📋 Ingredient Notes
- Fava beans – The main ingredient! Instead of relying on traditional soybeans to make tofu, you’ll use split, dehulled fava beans here. They have a yellow color and are about the same size as white navy beans.
➜ Where to buy: You can buy split fava beans online or in well-stocked Middle Eastern grocery stores.
- Nigari – Also known as magnesium chloride, nigari is the key ingredient that helps the fava bean milk coagulate. Once it’s added, it causes the proteins in the fava bean milk to separate and form curds that are then pressed into a firm block.
Equipment You’ll Need
Nut Milk Bag: First, you’ll need a nut milk bag to filter out the bean pulp.
Tofu Press: To press the curds. I’m using a traditional wooden one similar to this Hinoki Tofu Maker Kit, but other types are available – some are made of stainless steel, while others come with a built-in pressing system. If you don’t have a tofu press, don’t worry! You can get creative and assemble your own setup. For example, you could line a colander with cheesecloth and use a small plate topped with cans to press the curds. Your tofu won’t have the best shape, but it will work!
Cheesecloth: You’ll need a cheesecloth to line the tofu press and hold the curds in place while allowing the water to drain. I recommend dampening the cheesecloth before arranging it inside the wooden press, as this makes it easier to work with.
A few cans: You’ll also need three cans to press the tofu. Coconut milk, diced tomatoes, or cooked beans all work, it doesn’t matter what’s inside! As long as each can weighs around 15 ounces (425 g) and can be stacked on top of each other, you’re good to go.
🥣 How to Make Soy-Free Tofu
- Soak the fava beans. Add the beans to a large mixing bowl and cover them with water. Let them soak overnight.
- Rinse and drain. Next, rinse the beans 3-4 times under cold water or until the water runs almost clear. Drain them well.
- Blend the fava beans. Transfer the beans to the blender and cover with water.
- Blend for about 30 seconds.
- Strain the milk. Pour the fava bean milk into a nut milk bag.
- Squeeze to extract as much liquid as possible.
- Let the milk sit. Next, cover the bowl of milk with plastic wrap and let it sit undisturbed for about 2 hours. This step allows the starch to settle at the bottom of the bowl.
- Scoop out the milk. Once you can see the starch at the bottom of the bowl, use a measuring cup or a ladle to scoop out the milk.
- Be careful: You only want to scoop out the milk and leave the starch in the bowl.
- Bring to a boil. Bring the milk to a boil, then simmer for 8-10 minutes, stirring constantly.
- Let it cool. Allow the milk to cool down to 167°F (75°C).
- Add the coagulant. Once it has reached that temperature, pour in the nigari.
- Stir. Gently stir a few times using a wooden spoon or spatula to distribute the coagulant.
- Let it curdle. Allow the milk to curdle for 20-25 minutes.
- After that, the milk will have separated into curds and whey.
- Transfer to a tofu press. Using a fine-mesh sieve, scoop out the curds and transfer them to a tofu press lined with a cheesecloth.
- Fold the cheesecloth over the curds.
- Add the lid. Place the top lid over the cheesecloth.
- Press until it forms a block. Finally, place three 15-ounce cans on top of the lid. Leave the tofu in the press for about 2 hours. Your tofu is done!
🍚 How to Cook It
You can use this fava bean tofu pretty much anywhere you’d use regular tofu. Slice it, cube it, or crumble it! Here are a few suggestions for how to cook it:
- Air-fry it: For crispy, golden tofu, like in my lemongrass tofu, vegan butter chicken, or teriyaki tofu.
- Pan-fry it: Cut it into cubes or slices and pan-fry it until golden.
- Bake it: Bake until crispy to make General Tso’s tofu, seaweed tofu rolls, or braised cabbage with smoked tofu.
- Use it in stews & braised dishes: Its firm texture makes it perfect for saucy dishes like this Gochujang tofu, braised tofu and mushrooms, or this eggplant and tofu with spicy peanut sauce.
- Crumble it: Use it to make vegan egg salad or bolognese.
Make It Smoky!
If you want to make a smoky version, marinate one loaf of tofu with 1/4 cup soy sauce, 1 tbsp sesame oil, and 1 tbsp maple syrup for 6-8 hours. Then, smoke the tofu in a stovetop smoker for 20-25 minutes over low heat, flipping it halfway through. Allow it to cool completely before enjoying. We really love this version!
❄️ Storage
You can store this fava bean tofu for up to 5 days in the refrigerator.
Can you freeze this tofu? Just like regular soy tofu, you can freeze it. Just keep in mind that freezing it will alter its texture.
💬 FAQs
Can I cook fava bean tofu the same as soy tofu?
Yes! It works the same. You can air-fry it, bake it, or sauté it.
Does fava bean tofu taste like regular tofu?
It doesn’t taste the same, but it’s very close. Especially once marinated and cooked, you probably won’t be able to tell the difference. On its own, fava bean tofu has a slightly more pronounced bean flavor compared to soy tofu.
Can I use whole fava beans with the skin on?
No. You must use dehulled fava beans.
My tofu is very grainy and bitter. What happened?
Too much nigari can make the tofu grainy and bitter. Make sure you measure your nigari flakes correctly. If using nigari powder, use the same weight, not the same volume.
Enter your email below and I’ll send it to your inbox!
Plus, you will receive new recipes every week!
Instructions
- Soak the fava beans. Add the beans to a large mixing bowl and cover them with water. Let them soak overnight at room temperature.
Make the fava bean milk
- Rinse and drain the beans. Rinse the beans 3-4 times under cold water or until the water runs almost clear. Drain them well.
- Blend them. Transfer about half of the soaked beans to a blender and pour in 6 cups of water. Blend for about 30 seconds. Note: I blend the beans in two batches, as 12 cups of water don't fit in my blender.
- Strain the milk. Place a nut milk bag over a large glass mixing bowl. Next, pour the blended mixture into a nut milk bag. Use your hands to squeeze the bag and extract as much liquid as possible. Discard the pulp.
- Repeat. Transfer the remaining beans to a blender and add the remaining 6 cups of water. Blend again for 30 seconds and strain the milk using the same nut milk bag.
- Scoop out the milk. Once you can see the starch at the bottom of the bowl, use a measuring cup or a ladle to scoop out the milk and transfer it to a large pot or saucepan (I use my Instant Pot liner). Be careful: You only want to scoop out the milk, leaving the starch in the bowl.
Make the tofu
- Bring to a boil. Bring the milk to a boil, then reduce the heat and simmer for 8-10 minutes, stirring constantly.
- Let it cool. Remove the pot from the heat and allow the milk to cool down to 167°F (75°C). I highly recommend using a kitchen thermometer for this step.
- Prepare the nigari. In the meantime, add the nigari flakes to a small bowl. Pour in 1/4 cup of warm water (at about 140°F / 60°C) and stir until the nigari is completely dissolved.
- Add the coagulant. Once the milk has reached the recommended temperature, slowly pour in the dissolved nigari while stirring. Gently stir a few more times using a wooden spoon or spatula to distribute the coagulant.
- Let it curdle. Allow the milk to curdle for 20-25 minutes. Do not stir during this step. The milk will separate into curds and whey.
- Prepare your tofu press. Slightly wet the cheesecloth and arrange it in your tofu press. Place the press inside a large baking dish so the whey can drain.
- Transfer to the press. Using a fine-mesh sieve, scoop out the curds and transfer them to the tofu press. Fold the cheesecloth over the curds.
- Press until the curds form a block. Place the top lid over the cheesecloth. Then, place three 15-ounce cans on top of the lid. Leave the tofu in the press for about 2 hours.Remove the lid and check your tofu. If it's not firm enough for your liking, press it for another 2 hours. Your tofu is now ready!
- Store the fava bean tofu in the refrigerator for up to 5 days.