Secrets to achieving a homemade strawberry pie with a crisp crust
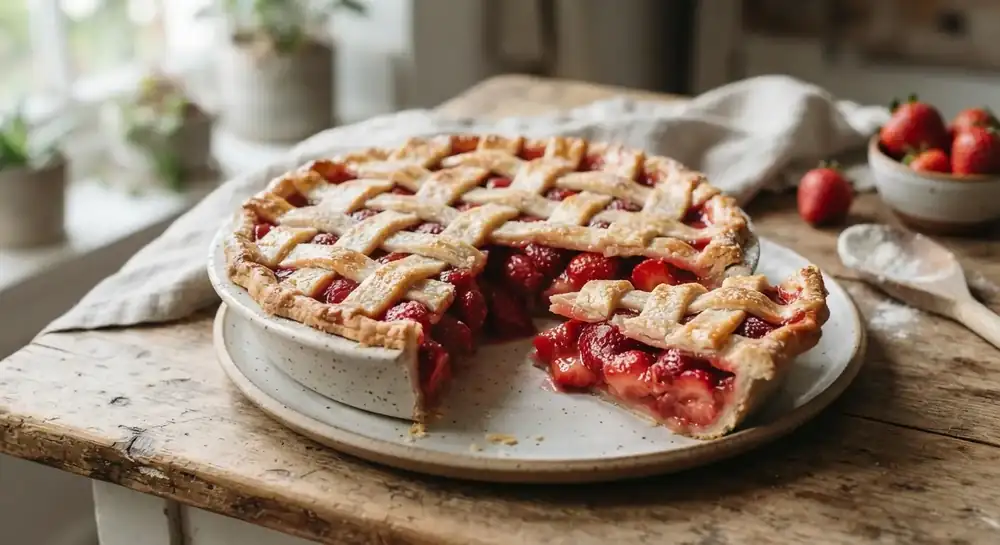
Strawberry pie is undoubtedly one of the most beloved fruit tarts in international pastry. With its roots deeply in American cuisine, this dessert stands out for its classic structure: a solid crust and a topping that protects the fruit's juiciness.
At first bite, you'll discover the perfect balance between the fruit's natural sweetness and a citrusy touch that enhances the flavors. The crust, well-worked but not over-kneaded, offers that crumbly texture that makes the dessert melt in your mouth. If you choose to serve it with a scoop of ice cream, you'll elevate the experience to the next level, making it the perfect ending to any meal. Below, you'll learn the precise steps and some technical tricks to ensure your strawberry pie turns out flawlessly, from preparing the crust to the final baking.
The key to success: technique and temperature.
To achieve a cake with a professional texture, handling the ingredients is essential. Here's how to take care of the technical details:
- Avoid over-kneading: when incorporating the shortening or butter with the dry ingredients, aim only for cohesion. Over-kneading will develop the gluten in the flour, and the dough will lose that crumbly, delicate quality we look for in a good pastry.
- Using plastic wrap: it's the best way to roll out delicate dough. By placing the dough between two sheets, you'll prevent it from sticking to the rolling pin or work surface, allowing you to handle it much more cleanly and easily.
- The importance of chilling: Refrigerating the pastry molds before filling and baking is crucial. This resting period allows the fat to solidify, preventing the pastry from deforming or shrinking drastically when exposed to the oven's heat.
The filling and baking: how to achieve the ideal consistency.
A well-structured filling is what separates a memorable dessert from one that falls apart when served.
- The role of cornstarch: It's the key ingredient that transforms natural strawberry juices into a thick, glossy sauce. When heated, the starch thickens the mixture, preventing the base from becoming too soggy.
- Sealing the edges: When joining the base to the top, use a fork to gently press the edges together. This not only provides a classic decorative finish but also ensures that the filling stays contained during baking.
- Steam release: Making a small cross in the center of the top layer of dough is an essential technical step. This allows the steam generated by cooking the fruit to escape, preventing the pressure from breaking the structure of your tart.
Ingredients
- 100 grams of lard or butter
- 40 grams of sugar
- 200 grams of 0000 flour
- 1 egg
- 1 teaspoon of baking powder (chemical leavening)
- 2 teaspoons of citrus zest (orange or lemon), divided
- 300 grams of strawberries
- 20 grams of honey
- 20 grams of corn starch (cornflour)
- 10 grams of sugar (for the filling)
Preparation
- For the dough, form a well with the dry ingredients on the table. In the center, place the softened butter and a teaspoon of citrus zest.
- Combine the ingredients with your hands until you obtain a smooth dough, avoiding over-kneading.
- Divide the bun into four equal parts to obtain two small cakes.
- Place a portion of dough between two sheets of cling film and roll it out with a rolling pin.
- Line the base of the 15cm diameter molds with the dough, making sure it reaches the edges without pressing too hard. Repeat with another portion and refrigerate both molds.
- Stretch out the two remaining portions of dough, keeping them between the film, and set them aside in the refrigerator for the topping.
- For the filling, mix the strawberries in a bowl with the 10 grams of sugar, the honey, the cornstarch and the remaining teaspoon of citrus zest.
- Distribute the filling evenly in the prepared molds.
- Cover each mold with the reserved dough lids, using the cling film to help you handle them.
- Carefully join the edges of both sheets of dough to seal the tart.
- Cut off the excess dough, seal the edges with a fork, and make a cross cut in the center with a knife.
- Bake at 180°C for approximately 30 minutes or until the surface is golden brown.
- Remove from the oven and let cool on a wire rack before serving.
This dessert is an excellent option for vegetarians, and by preparing it with the indicated ingredients, you'll get a trans-fat-free tart. Although it's a high-calorie and high-sugar dish, enjoying it in moderation will allow you to appreciate the contrast between the crispy crust and the freshness of the fruit in every bite.
This article was generated with the support of AI and reviewed by an editor. For more information, please see our terms and conditions.