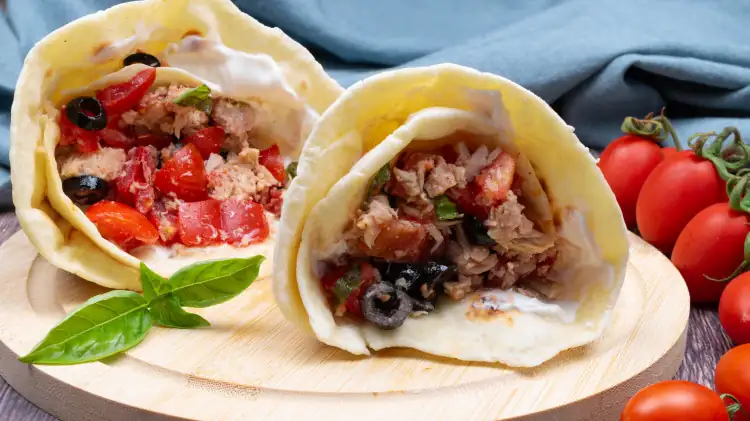
No more sad sandwiches! The ingenious trick to making a crispy cone of stuffed piadina in just 10 minutes
Taking a classic dish and completely transforming its shape is the most effective way to wow your guests with a touch of originality. Crispy piadina cones are born from this very idea, transforming a traditional dinner-saver into an irresistibly crumbly wrapper.
- Piadina The ideal ones are those with protein and yogurt 4
- 200g drained tuna in oil
- 200g datterini or cherry tomatoes
- Spreadable cheese 4 tablespoons
- Pitted black olives 50 g
- Basil leaves
- Extra virgin olive oil (EVO)
- Sale
- Baby
- Start by thoroughly washing the cherry tomatoes under running water, then chop them into small pieces. Take the pitted black olives and cut them into even slices. In a large bowl, combine the cherry tomatoes, olives, and tuna, well drained of its preserving oil.
- Add the fresh basil, roughly chopping it with your hands to release its full aroma. Season with salt, pepper, and a drizzle of extra virgin olive oil, then mix well to blend all the flavors.
- Take the piadinas and spread a thin layer of cream cheese over the entire surface. Make a single, clean cut starting from the exact center of the disc and extending to the outer edge of the piadina. Now, take one of the two cut edges and roll the piadina up along the entire perimeter, creating a cone that is tightly closed at the base. Secure it temporarily with a toothpick.
- To achieve the crunchy effect, toast the empty cones in a hot nonstick pan for a couple of minutes. Turn them very carefully until they are golden brown and firm to the touch. Remove the cones from the heat and fill them generously with the tuna and cherry tomato salad prepared earlier.
For the base, you can choose to knead a traditional Piadina Romagnola with your own hands or speed up the steps by choosing a versatile Greek yogurt protein piadina, perfect because it remains elastic when folded.
This recipe deserves a place in your personal collection of 4 fresh, no-cook summer recipes that will save your dinner, saving your evening with a bit of creativity and zero stress in front of the stove.
The filling celebrates the aromas of the Mediterranean through a filling that closely recalls the freshness of a rich Nicoise Salad, where the saltiness of the fish meets the sweetness of the cherry tomatoes and the bold note of the olives.
If you're looking for a variation with an even more enveloping consistency, try spreading a soft homemade tuna mousse on the bottom of the wafer, excellent for sealing the tip and preventing the liquid from leaking out.
Serving this delicious cone-shaped piadina during a casual evening will allow you to vary the usual buffet menu, perhaps alongside the classic cold rolls for an aperitif to create an attractive visual contrast.
After all, offering 6 delicious homemade finger foods—simple appetizer ideas—is the most fun way to whet your appetite before a dinner with friends.
Fire up your nonstick griddle and get ready for that amazing crunch that will transform every bite into a crispy experience. Here are a few simple steps to complete your next quick aperitif with piadina.
Doses & Ingredients
- Very low difficulty
- Very low cost
- Basil leaves to taste
- Extra virgin olive oil (EVO) to taste
- Sale q.b.
- Pepe q.b.
- Bowl / Knife / Spoon / Non-stick pan / Cutting board.
How to make crispy piadina cones with step-by-step photos
- 1. Start by thoroughly washing the cherry tomatoes under running water, then chop them into small pieces. Take the pitted black olives and cut them into even slices. In a large bowl, combine the cherry tomatoes, add the olives, and add the tuna, well drained of its preserving oil.
- 2. Add the fresh basil, roughly chopping it with your hands to release its full aroma. Season with salt, pepper, and a drizzle of extra virgin olive oil, then mix well to blend all the flavors.
- 3 Take the piadinas and spread a thin layer of cream cheese over the entire surface. Make a single, clean cut starting from the exact center of the disc and extending to the outer edge of the piadina. Now, take one of the two cut edges and roll the piadina up along the entire perimeter, creating a cone that is tightly closed at the base. Secure it temporarily with a toothpick.
- 4 To achieve the crunchy effect, toast the empty cones in a hot nonstick pan for a couple of minutes. Turn them very carefully until they are golden brown and firm to the touch. Remove the cones from the heat and fill them generously with the tuna and cherry tomato salad prepared earlier.
How to store stuffed piadina cones
- I recommend enjoying your crispy piadina cones as soon as they're ready, so you can fully appreciate the contrast between the warm, crumbly base and the fresh filling. If you have any leftovers, you can store the tuna and cherry tomato salad in the refrigerator, in an airtight container, for up to 24 hours. Empty, toasted piadina cones will keep at room temperature for up to 1 day, provided they're tightly sealed. Before filling them, simply toss them in a hot pan for a minute to restore the crunch. Avoid storing filled cones entirely: the moisture from the cream cheese and cherry tomatoes will compromise their crispy texture, making them soft.
Tips and variations
- To shape your piadina cones without breaking them, make sure the base is very fresh and elastic. If you notice the pastry is slightly stiff, heat it for just 5 seconds per side in a pan before cutting: the heat will make it immediately pliable. If you want to serve this treat in an original way at a buffet, place the cones upright inside small glasses, or fit them between the spaces of an upside-down muffin pan to keep them perfectly upright. This recipe is open to endless customizations. You can vary the filling to suit your tastes with these quick and easy variations: Salmon and avocado: replace the tuna with strips of smoked salmon and juicy avocado cubes, drizzled with a few drops of lime. Greek and vegetarian: fill the crispy shell with crumbled feta, diced cucumber, black olives, and a pinch of dried oregano. Caprese Style: Keep it simple by combining quartered mozzarella balls, cherry tomatoes, and a teaspoon of Genovese pesto. Chicken and Crunchy Salad: Recycle shredded roast chicken by mixing it with a light mayonnaise and finely chopped iceberg lettuce.
Which flatbreads are best for forming cones?
Protein wraps with yogurt, as their elastic texture allows them to be easily rolled without breaking along the edges. If using classic wraps, warm them for a few seconds in a pan before working with them.
Can I prepare the cones ahead of time for an aperitif?
crunch effect, but I suggest you fill them just a few moments before serving, so that the filling doesn't moisten the pastry excessively.
What can I do if the cone opens in the pan?
Place a toothpick in the pan before placing it in the pan. While toasting, place the cone on its seam side for the first minute: the heat will slightly melt the cream cheese, which will act as a natural "glue" to hold it in place.