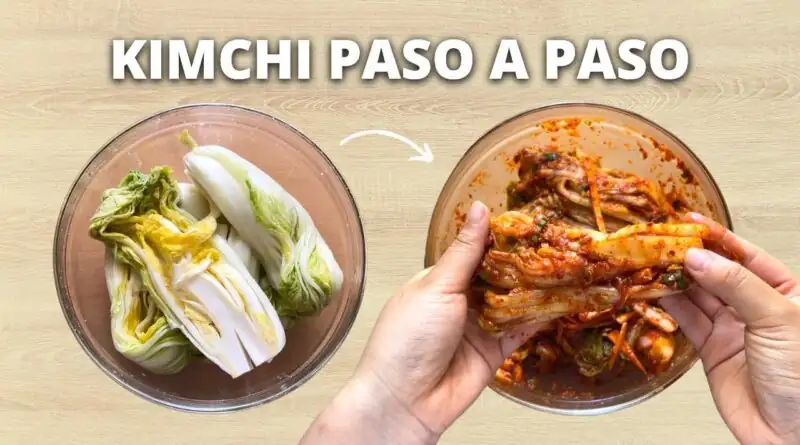
Kimchi recipe in Spanish: step by step to prepare traditional homemade kimchi
Discover how to prepare traditional homemade kimchi step by step
Kimchi is one of the most iconic fermented dishes in Korean cuisine, renowned worldwide for its unique flavor and numerous health benefits. In Peru, more and more people are experimenting with this preparation that combines tradition, fermentation, and a touch of spice that delights even the most discerning palates. In this article, we'll teach you in detail how to make an authentic version of kimchi at home, using readily available ingredients and simple techniques that will allow you to achieve a delicious and healthy result.
Before we delve into the step-by-step instructions, it's important to understand that kimchi is a fermented preparation made from napa cabbage (also known as Chinese cabbage), along with a blend of spices and vegetables that provide flavor and texture. Its natural fermentation process allows it to develop a flavor profile that is acidic, spicy, and umami, as well as promoting the growth of beneficial bacteria for the gut flora.
Essential ingredients for preparing traditional homemade kimchi
To make a traditional Korean-style kimchi recipe, you will need the following ingredients:
- 1 medium-sized napa cabbage
- 1/4 cup coarse salt for the brining process
- 5 cups of water for the brine
- 1 cup of Korean radishes or diced white radish
- 4 cloves of garlic, finely chopped or crushed
- 1 piece of fresh grated ginger (approximately 2 tablespoons)
- 3 tablespoons of fish sauce (you can substitute soy sauce for a vegetarian version)
- 2 tablespoons of sugar to balance flavors
- 1/2 cup Korean chili powder (gochugaru) for the characteristic spiciness and red color
- 3 spring onions, chopped into small pieces
Detailed preparation: step by step for perfect kimchi
The key to successful fermentation and a kimchi with a rich flavor lies in meticulous attention to detail at every stage of the process. Below, we explain how to do it in detail:
1. Prepare the Chinese cabbage
First, you should wash the napa cabbage thoroughly under cold running water to remove any impurities or dirt residue. Then, cut the cabbage in half lengthwise and then into more manageable pieces, approximately 4 to 5 centimeters wide.
In a large bowl, dissolve the coarse salt in 5 cups of water to form a brine. Add the chopped cabbage to this solution, making sure it's completely submerged. You can place a plate or weight on top to help with this. Let it sit for 6 to 8 hours, or until the leaves are soft and pliable. This step is crucial for removing excess water and ensuring the cabbage remains crisp and ready to absorb the flavors of the dressing.
2. Prepare the spice paste
While the cabbage is brining, you can prepare the mixture that will give the kimchi its characteristic flavor. In a large bowl, combine the crushed garlic, grated ginger, fish sauce, sugar, and Korean chili powder. Mix well until you have a smooth paste. If you prefer spicier kimchi, you can adjust the amount of gochugaru to your liking.
Add the diced radish and chopped spring onion to this mixture, combining all the ingredients so that they are well coated with the spice paste.
3. Rinse and drain the cabbage
Once the brining time is over, remove the cabbage from the water and rinse it several times with cold water to remove excess salt. It's important that the cabbage isn't too salty, as this will affect the final flavor. Then, drain it well to remove any excess water, as this could dilute the spice paste and hinder fermentation.
4. Mix the cabbage with the spice paste
In a large bowl, mix the drained cabbage with the prepared spice paste. Wear gloves to avoid irritating your hands with the chili pepper's heat. Make sure each cabbage leaf is well coated with the mixture, pressing lightly so the paste penetrates between the leaves and the radish.
5. Bottling and fermenting
Finally, place the mixture in a clean, dry glass jar, pressing it down firmly to remove any air pockets and compact the kimchi. Leave some headspace at the top to allow for proper fermentation. Seal the jar, but not airtight, as the fermentation process will produce gas.
Leave the kimchi at room temperature for 1 to 2 days to begin fermentation. Then, transfer it to the refrigerator to allow fermentation to continue slowly and the flavors to develop fully. The kimchi will be ready to eat after a week, although its flavor will improve with time.
Benefits of preparing kimchi at home
Making this fermented preparation in your own kitchen not only allows you to control the quality of the ingredients, but also offers multiple advantages:
- Digestive health: Thanks to the probiotic bacteria generated during fermentation, kimchi helps improve intestinal flora and promotes digestion.
- Source of vitamins and minerals: Chinese cabbage and radish provide vitamins A, C and K, as well as minerals such as calcium and iron.
- Low in calories: It's a nutritious and light option to complement your daily meals.
- Culinary versatility: You can accompany it with rice, meats, soups or even integrate it into fusion dishes with Peruvian flavors.
Variations to enjoy kimchi tailored to your tastes
While the traditional Korean recipe is the base, in Peru you can experiment with different variations that incorporate local ingredients or that adapt to your preferences:
For example, you can replace the Korean radish with Peruvian radish or even grated carrot for a sweet and crunchy touch. You can also adjust the spiciness level to your liking by using more or less chili powder. If you prefer a vegetarian or vegan version, omit the fish sauce and use soy sauce or miso to add umami.
Another interesting option is to add fruits like grated apple or pear, which provide natural sweetness and aid fermentation. You can also include fresh herbs like cilantro or mint for a different and refreshing aroma.
Practical tips for a successful homemade kimchi
To ensure your kimchi has the best texture and flavor, consider these recommendations:
- Use fresh, good quality ingredients, preferably organic.
- Respect the brining times to avoid the cabbage becoming too soft or salty.
- Use glass jars with airtight lids for cold fermentation.
- Control the temperature during fermentation: ideally between 18°C and 22°C at the beginning and then under refrigeration.
- Taste the kimchi periodically to assess its flavor and texture, as fermentation can vary depending on the climate and ingredients.
Incorporate kimchi into your daily diet with these ideas
Kimchi is not only a traditional side dish, but it can also become the star of various Peruvian and fusion dishes:
Chaufa rice with kimchi: Add chopped kimchi to your chaufa rice to give it a tangy and spicy touch that perfectly complements the oriental and Peruvian flavors.
Anticuchos with kimchi sauce: Prepare a fermented kimchi-based sauce to marinate or accompany your anticuchos, creating a unique blend of flavors.
Kimchi ceviche: Mix your traditional ceviche with some chopped kimchi to add a contrast of textures and fermented flavors.
Empanadas filled with kimchi and cheese: A surprising combination that fuses Peruvian tradition with Korean intensity.
Implicit conclusion: kimchi as a cultural and gastronomic bridge
In today's culinary landscape, where globalization and gastronomic diversity are increasingly valued, preparing this fermented dish at home is an excellent way to connect with other cultures without leaving Peru. Furthermore, experimenting with this preparation will allow you to discover new combinations and flavors, enrich your palate, and reap the health benefits that kimchi offers.
Now that you know the detailed process for preparing your own traditional homemade kimchi, go ahead and try it and surprise your family and friends with this culinary gem that combines tradition, flavor and health in every bite!