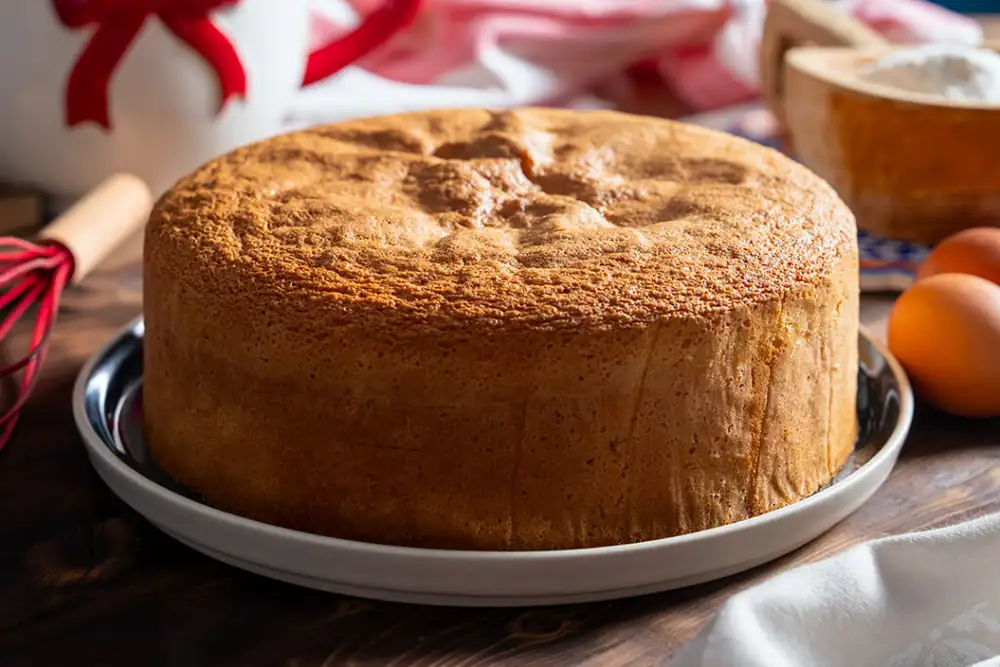
Fluffy vanilla dough for delicious cakes
9,1K
Nutrition per serving/piece
Making a fluffy vanilla cake and well-risen is the basis of any perfect dessert for any special occasion. In this article you will learn how to prepare a cake cake recipe, presented step by step, which emphasizes the correct beating of eggs, to obtain a sponge cake with an elastic and light aerated texture. Simple, with few ingredients and very tasty.
This guide is worth reading because it goes beyond the usual instructions, providing information on baking, choosing a quality flour and the role of a 23 cm cake pan. You will learn how to monitor baking so that the cake bakes perfectly and get perfectly frothy eggs by using the mixer correctly.
What is a vanilla fluffy cake and why is it the perfect base?
A fluffy vanilla base is the foundation of any successful cake, providing that airy, smooth texture that compliments any cream. Unlike other variations, this sponge cake relies on a simple but rigorous technique of incorporating air into the eggs.
Choosing a vanilla base guarantees a dessert that doesn't fall apart and remains elastic even after being soaked in syrup. It's the ideal option for family cakes, as it's easy to customize with various flavors or fresh fruits, such as strawberries.
To get a cake like the one you get at the bakery, the quality of the ingredients is critical. Using real vanilla extract and fresh eggs will make the difference between a mediocre taste and a memorable one. I've made a vanilla cake recipe in the past, but it's not as high.
How do we start the process of preparing vanilla cake for optimal results?
The method of making the dough always starts with bringing all the ingredients to room temperature. This thermal uniformity allows the eggs to whip more quickly and maintain their volume during mixing.
In the process of preparing the dough, organization is key: weigh out exactly 250 grams of flour and prepare the mixer. Any delay after the eggs have been beaten can lead to the loss of essential air bubbles.
Another golden rule in its preparation is to sift the dry ingredients finely. A sifted flour will be incorporated much more easily into the composition, eliminating the risk of finding lumps of flour in the baked dough. However, sifting is not mandatory and can be omitted or replaced by mixing the flour with a whisk.
What are the secrets to a successful fluffy vanilla cake?
A true sponge cake does not rely on large amounts of leavening agent, but on the mechanical force of beaten eggs. You need to mix until the mixture becomes a dense foam and triples its original volume. This usually requires about 10 minutes of beating.
To keep the dough airy, the flour should be incorporated manually, using a spatula. The movements should be broad, circular, from bottom to top, to "pack" the air into the dough without destroying it.
Patience is key for sponge cake; don't rush to add all the flour at once. Adding it in small batches allows you to maintain that stable foamy texture that will rise spectacularly in the oven.
Can I use cocoa in a simple cake batter recipe?
You can easily transform this classic recipe into a chocolate cake by replacing some of the flour with good quality cocoa. It is vital to mix the cocoa powder with the flour to avoid lumps in this sponge cake. I use a small whisk to mix them together.
To maintain the aerated sponge cake texture, do not exceed 30-40 grams of cocoa in the composition. If you add too much dry powder, the structure of the egg whites may collapse, resulting in a dense cake instead of an aerated one. You can consult my cocoa cake base recipe for grams and preparation.
If you prefer intense flavors, you can also use a coffee extract that accentuates the cocoa taste. This version of the dough preparation remains just as elastic, making it ideal for cakes with mascarpone or ganache.
How can I adapt the recipe for different pan sizes?
To obtain a tall sponge cake, I recommend using a 23 cm diameter pan. This size is optimal for an 8-egg recipe, providing the necessary space for the dough to rise evenly up the sides of the pan.
The tray should be lined with baking paper both at the base and on its walls. This way the cake will not stick to the walls, but only to the baking paper. The sponge cake will rise beautifully, it will be easy to remove from the tray and will not fall. You will no longer have to struggle not to break it.
If you don't need such tall cake tops, you can also use a 26 cm diameter pan. Being larger, the cake tops won't be as tall. You can also reduce the quantities using the simple rule of three and make it with 6 eggs or even 4 eggs. That way it won't be as tall.
Correct baking: The role of temperature and the most suitable baking function.
Baking for this fluffy vanilla cake is done at 180 degrees. I do not recommend using ventilation because it forces baking and this way the composition can dry out and burn on top, remaining unbaked inside. It will seem to you that it is baked, but once removed from the oven it will be soft. Use the classic function, with heat up and down, without ventilation.
It is vital not to open the oven door for the first 20 minutes of baking for this cake. Any draft of cold air can compromise the fragile structure of the eggs, causing the sponge cake to suddenly drop. I only check it towards the end, after 30-35 minutes.
Cooking times vary, but a simple cake is ready when it turns golden brown and passes the toothpick test. Take a toothpick and insert it into the middle. Take it out and check for wet batter. If it comes out clean, the cake is done. After baking, leave it in the pan for just a few minutes before removing the pan ring.
How do we cool the dough and make sure it is ready to be used for the cake?
After removing from the oven, the dough should not be handled immediately. It is important to leave it in the pan for about ten to fifteen minutes, during which time the internal structure stabilizes and the accumulated steam is gradually released. This process prevents sagging and helps to maintain the volume obtained during baking.
Afterwards, the cake is carefully removed from the mold and placed on a cooling rack. The rack allows air to circulate on all sides, avoiding the formation of condensation and softening of the base. The uniform cooling helps maintain a firm and elastic texture.
The dough is considered ready to use only after it has cooled completely. It should be cool to the touch, slightly elastic and dry. Only at this stage can it be cut, drizzled with syrup or assembled without the risk of crumbling. I prefer to put it in the refrigerator overnight to make it even easier to cut.
How to properly cut a cake to make cake slices?
To properly cut a cake, it must be completely cooled, stable, and well ventilated. Complete cooling prevents crumbling and allows for clean layers. Before cutting, it is a good idea to check that the surface is level and, if necessary, level the top slightly.
To cut, use a long, very sharp knife or a special thread for countertops. It is important to mark the desired height of the slices so that the layers are equal. The movement should be smooth, without sudden pressure.
As you cut, rotate the cake to keep it level all the way around. After separating, carefully lift each sheet, using a spatula, to maintain the shape and appearance of the slices. The end result will be a balanced cake, easy to assemble and with even layers.
Summary to remember:
Ingredients: Use quality flour and eggs at room temperature.
Mixing: Beat the eggs until they become thick foam, at least 10 minutes, at maximum speed.
Mixing: Fold in the flour gently with a spatula to keep the air incorporated.
Baking: Use a 23 cm pan and bake without ventilation for approx. 40 min.
Check: Make sure the cake is well baked by using the toothpick test before removing the ring.
Cooling: Let the cake cool on the rack to avoid losing height.