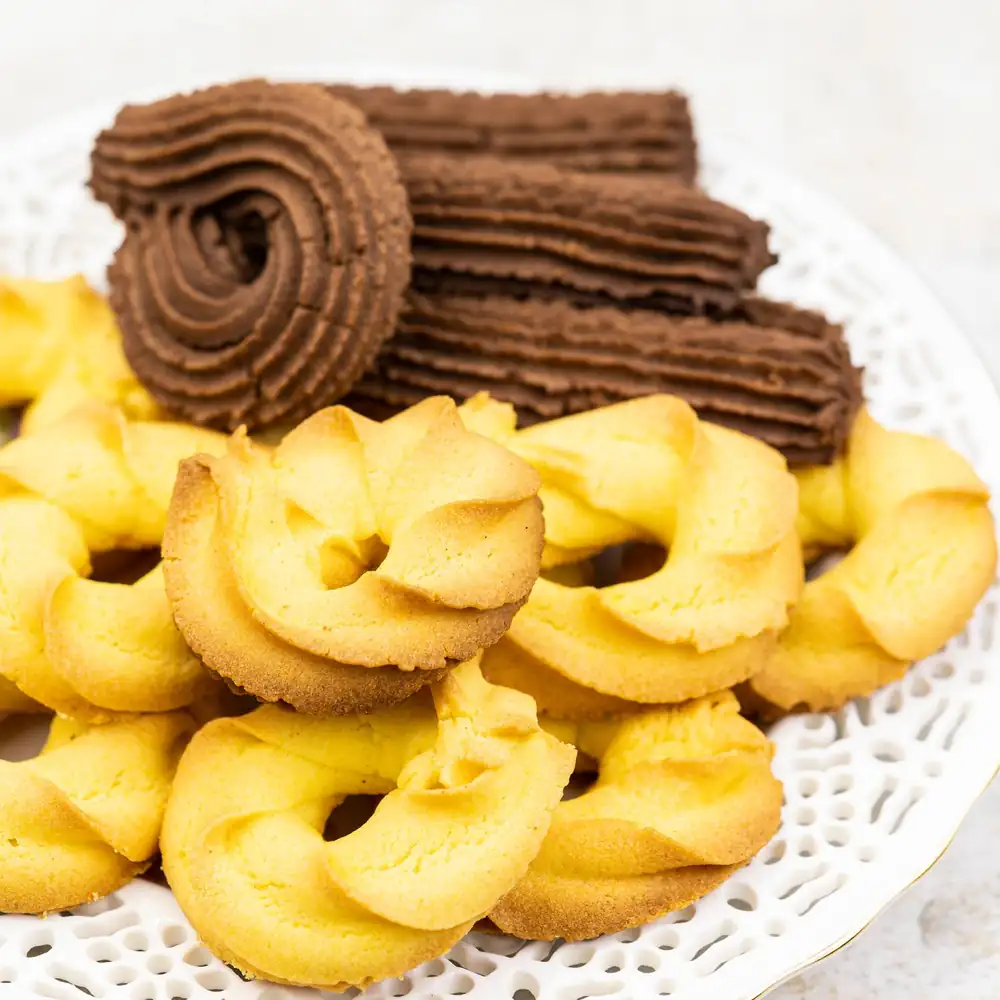
Gluten-free cookies
Be sure to check out how to make super simple and delicious gluten-free cookies. This is a basic recipe, so you can bake cookies with just a few common ingredients.
- gluten-free shortbread cookies - several ways to shape cookies - very detailed recipe and step-by-step photos
Preparation time: 20 minutes Dough cooling time: 1 hour Cookies baking time: 12 minutes Number of servings: about 35 cookies Energy value 482 kcal Carbohydrates 58 g - Including sugars 13 g Protein 4 g Fat 26 g Diet: gluten-free, vegetarian.
- 200 g corn flour - a full glass
- 2 vanilla or cream puddings without sugar - 2 x 40 g
- 60 g powdered sugar - about 4 full tablespoons
- 150 g butter - 3/4 of a classic cube
- 1 large egg*
- optional additions: cinnamon; cocoa or carob; citrus peel
Gluten-free cookies
My glass holds 250 ml. Bake: 200 degrees Celsius, middle rack with top/bottom heat, or 185 degrees Celsius with convection. Baking time: approximately 10-12 minutes.
The calories were calculated based on the ingredients I used. This is an approximate calorie count, as your ingredients may have a different calorie count than the ones I used. Before you start making the cookies, I recommend reading the entire recipe first to prepare for the next steps. *A large egg is added when pressing cookies from a food processor or a pastry bag with a wider tip. If you're making cookies that you'll be cutting out with cookie cutters or shaping them with your hands, I recommend adding a small egg to make the dough firmer. You can replace the egg with a similar amount of cream (vegan is also fine); thick plain yogurt; thick flaxseed jelly; or cold water from soaking chickpeas (e.g., from a can). When buying pudding, check that it's gluten-free (unless that's not a concern for you).
Gluten-free cookies recipe
In a bowl, put together: 200 grams of corn flour (a full glass); 2 sachets/bags of gluten-free vanilla or cream-flavored pudding without sugar; 60 grams of powdered sugar or (about 4 full tablespoons or more if you prefer sweeter cookies); 150 grams of cold, diced butter (3/4 of a classic 200-gram block).
Tip: You can substitute 80 grams of potato starch for the custard powder, or use the same amount of cornstarch. Then add a few drops of vanilla or cream oil/flavoring, or a dash of vanilla paste or essence. Feel free to replace the cornflour with gluten-free oat flour or any flour blend: millet, buckwheat, almond, or chickpea. The important thing is that the flour mixture weighs a total of 200 grams. If you can't eat dairy, replace the butter with the same amount of coconut oil.
Mix everything together with your hands or a mixer with a shortcrust pastry hook. Try to work it as quickly as possible. At first, the dough may seem too loose, but as you rub in the butter, it should come together into a compact ball, as shown in the photo below by shaping a small piece of dough. I prefer to knead the dough in a large bowl, but you can also do it on a large board, clean countertop, or pastry board. Eggless dough can be easily formed into a ball and baked. However, it will crumble quite a bit during shaping. Therefore, I recommend adding an egg or other ingredients mentioned earlier (sour cream, thick plain yogurt, thick flaxseed jelly, cold water from soaking chickpeas (also from a can).
At this stage, decide whether you'll use a pastry machine or a pastry bag to press the cookies, or whether you'd rather shape them with your hands or roll out the dough and cut them out with cookie cutters. I chose to use a large, sturdy pastry bag with a larger tip, so I added a large egg. This will make the dough slightly looser, making it easier to press out of the bag.
If you're using a substitute for a large egg, use about 55 grams. If you're shaping the cookies by hand or using cookie cutters, use small ones or substitutes weighing up to 40 grams.
Knead the dough thoroughly to combine all the ingredients into a uniform, perhaps slightly looser dough. At this point, you can decide whether to add, for example, a pinch of cinnamon or a tablespoon of finely grated orange or lemon zest. It's also a good idea to divide the dough into two separate portions. You can add nothing to one portion, or a little cinnamon or grated zest, and a tablespoon (up to 10 grams) of cocoa or carob to the other.
For me, I left part of the dough plain and added a tablespoon of cocoa powder to the other half. I kneaded the dough briefly to obtain a uniform texture. If you add a tablespoon of cocoa powder to the entire dough, you'll get slightly cocoa-flavored cookies. It's interesting to add both cocoa and cinnamon together.
I covered the bowl of plain dough with plastic wrap and refrigerated it for an hour. I did the same with the bowl of cocoa dough. After an hour (you can easily chill the dough longer), the dough will be firmer, more uniform, and more compact. The butter has set, and the ingredients have combined nicely. I also refrigerate the dough when I plan to press cookies with a machine or a piping bag. Sometimes I shorten the chilling time to 30 minutes.
In the photo below, I've shown that the chilled dough can be easily formed into a compact ball. The dough with cocoa powder is firmer. I dusted the board with potato starch to prevent the dough balls from sticking.
Start preheating your oven now. Before placing the baking sheet with cookies in the oven, the oven must be thoroughly preheated to 200 degrees Celsius (400 degrees Fahrenheit) (regardless of whether you'll be using a piping bag, shaping them by hand, or cutting them out with cookie cutters).
I transferred my cookies to a large, reusable pastry bag (I use Wilton bags) with a larger tip (you can also use a piping bag without a tip). I first lined a thin sheet of parchment paper with parchment paper and piped cookies onto the paper in any desired shape. The cookie shapes were about 1.5 cm thick.
I placed the first batch of gluten-free cookies (I made two baking sheets) on the middle rack of an oven preheated to 200 degrees Celsius (400 degrees Fahrenheit) with the top/bottom heat setting. I baked the gluten-free cookies for 12 minutes. If your cookies are thinner, they can be done in as little as 8 minutes. I recommend keeping an eye on the oven. If the cookies are browning around the edges, it's definitely time to remove them from the oven.
Once the cookies are ready, I remove them from the oven immediately. I prepare a second batch and bake them the same way as the first. The baked cookies will be very soft and crumbly. So, don't touch them until they've completely cooled.
As I mentioned earlier, you can shape cookies very quickly and easily by tearing off a piece of dough and shaping it in your hands. Quickly form a small ball, then flatten it slightly and place it on a baking sheet lined with baking paper. Preparing pretty, flat cookies, such as heart-shaped cookies, takes a bit more work, as you need to dust the dough with starch and roll it between two sheets of parchment paper. After cutting out the shape (I recommend cookies up to 1 cm thick), carefully transfer the cookie to the parchment paper (a flat knife or spatula will come in handy). Note: gluten-free dough softens quickly, so you need to work with it quite carefully. If necessary, chill it again in the refrigerator. You can make many more than 35 such flat cookies.
Once cooled, I recommend loosely wrapping the gluten-free cookies in parchment paper, then in a regular bag or sandwich bags and storing them in a breadbox or kitchen cupboard. I'm not sure how long they'll stay fresh, as they disappear the day we bake them. However, they should be handled with care, as they are much more delicate and sandy than classic shortbread butter cookies.
Enjoy your meal.