How to Bake Bread with Yeast Water
Many have watched my video about how to make yeast water and were asking how to bake a bread with it. So I decided to make a video and show (and for some: prove) you how it’s done. Baking with yeast water is not much different from baking with sourdough: Both should be made with a pre-dough.
- 150 g wheat flour (AP or Bread Flour or spelt flour)
- 200 ml yeast water (alternative 1 pouch dry yeast)
- 150 g wheat flour
- 280 g whole wheat flour
- 80 g rye flour
- 12 g salt
- 1 to 2 tsp bread spice (optional)
- 230 ml yeast water
- 1 tbsp. olive or vegetable oil
- Mix the yeast water with the flour until all lumps are gone.Cover it and set at a warm place in the house for about 8 hours.Don't forget to feed the yeast water!
- Add all ingredients for the main dough into a large mixing bowl, add the pre-dough and start mixing on a lower speed for 5 minutes and then increase the speed and knead for another 5 minutes.
- Remove from the bowl, then fold and shape the dough as shown in the video.
- Cover the dough with a thin layer of vegetable or olive oil, put it back into the bowl, cover it and let rise at a warm place in the house until it has doubled its size. This can take 2 to 3 hours.
- Remove the dough from the bowl and again start to fold it and shape it. Prepare a proofing basket (if you have one) with flour or alternatively put flour onto the dough and use a bowl for the next step. Put the dough seam up into the proofing basket, cover it with a kitchen towel and let rise again.
- About 30 minutes before the dough has proofed enough: Put either a baking sheet or a cast iron pot int the oven and pre-heat the oven to 230°C / 450°F.
- When the dough has again proofed to about double its size, it's time to bake it.
- Remove either the baking sheet or the cast iron pot from the oven. Tip: Put some pachment paper into the pot for easier removal.
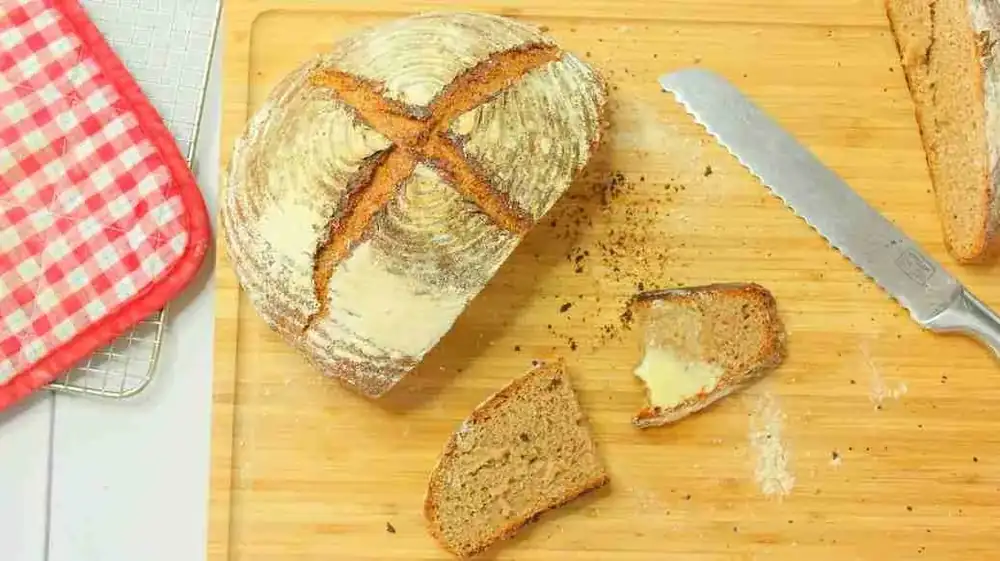
- Flip the bread onto the baking sheet or into the pot, then cut a cross (X) into the top of the bread. Close the lid (pot) and put the bread into the oven.
- Bake the bread for an overall of 60 minutes. If you are baking with the cast iron pot, remove the lid after 40 minutes and continue to bake the bread without the lid.
- After 60 minutes your bread should be perfectly ready. Let it cool completely before you cut it.
Though I wouldn’t rule out that one can use the yeast water directly in the bread recipe, it might take a lot longer for the dough to ferment and rise. Why Pre-Dough?
In the pre-dough with the yeast water, the yeast can double, triple, quadruple … over night or several hours during the day. This makes it much more powerful and more active and once mixed with the remaining ingredients, it can thrive better and faster. It still might need a longer period of time to rise the dough compared to what you are used to with store-bought yeast.
However, the time is still significantly shorter than a direct mix. Another reason is, that if your pre-dough fails to create bubbles and rise, you know that your homemade yeast didn’t turn out good and can start over before wasting all the other ingredients and the time for kneading until you learn that this bread will not rise.
So, it is also a check on your yeast. If it performs well, then you know you can go ahead and your dough will rise to a nice bread.
Feeding the Homemade Yeast Water
In this article’s video, I also show how to feed the yeast water and answer several questions that came up in the comments of the video and the blog post. I hope this will clarify some of the questions and help you, to successfully implement this technique of bread baking.
The Proofing time
It might happen that your yeast water let’s your dough rise faster or slower.
Every yeast water is different and it might become stronger and more active over time if you use and feed it on a regular basis. If your dough does not rise, even though your pre-dough was very active, something else must have gone wrong.
If Your Dough doesn’t Rise
Let’s not forget that yeast is still a sensitive organism and you can easily kill it with water that is too hot or if it gets into direct contact with salt.
So, let’s talk about what’s “lukewarm”. Luke-warm water is used in most yeast recipes.
Some yeast recipes call for cold water – those recipes require a very long proofing time and this is mostly used in rolls. So, most of the time you need luke-warm water and the temperature that is associated with that seems to be rather hot on some websites.
For that reason I will not give you an exact temperature to measur but instead a temperature that most parents can relate to: a little below baby bath temperature! It should feel warm but just not comfortable warm. What about salt?
Well, there is the saying that salt can kill the yeast and there is something to it but it’s not that bad. I would recommend to just either mix the ingredients and the yeast first and then add the salt a little later or just put the ingredients into your bowl in a way where the salt and the yeast / yeast-water don’t touch each other directly. This said: There is a special baking technique where salt and yeast are mixed with each other before baking … but that’s on a different level and I will get to that another time with store-bought yeast.
I hope you are successful with your yeast-water bread and get a loaf at least as nice as the one I got!
Your Baking Timeline
With the pre-dough and the proofing time, the bread isn’t baked that fast. Here are two suggested timelines:
Baking Bread for Dinner
- Prepare the pre-dough in the evening of the previous day and let get active over night.
- The next morning, prepare and mix with the main-dough, e.g. at 9 am.
- Let rise 2 to 3 hours (until doubled), e.g. until 12 pm.
- Shape the dough and let rise for another 2 hours.
- Bake at 2 pm, get it out of the oven at 3 pm, and let cool until dinner time.
Baking Bread for Breakfast
- Prepare the pre-dough in the morning e.g. at 9 am.
- Let stand for 8 hours, e.g. until 5 pm, then prepare and mix with the main-dough.
- Let rise 2 to 3 hours (until doubled), e.g. until 8 pm.
- Shape the dough and let rise overnight in the fridge.*
- Alternative: Let it rise for two hours and bake at 10 pm, get it out of the oven at 11 pm and cool overnight, no baking in the morning.
- Bake the next morning, e.g. at 7 am, the bread will be finished and cooled by 9 am.