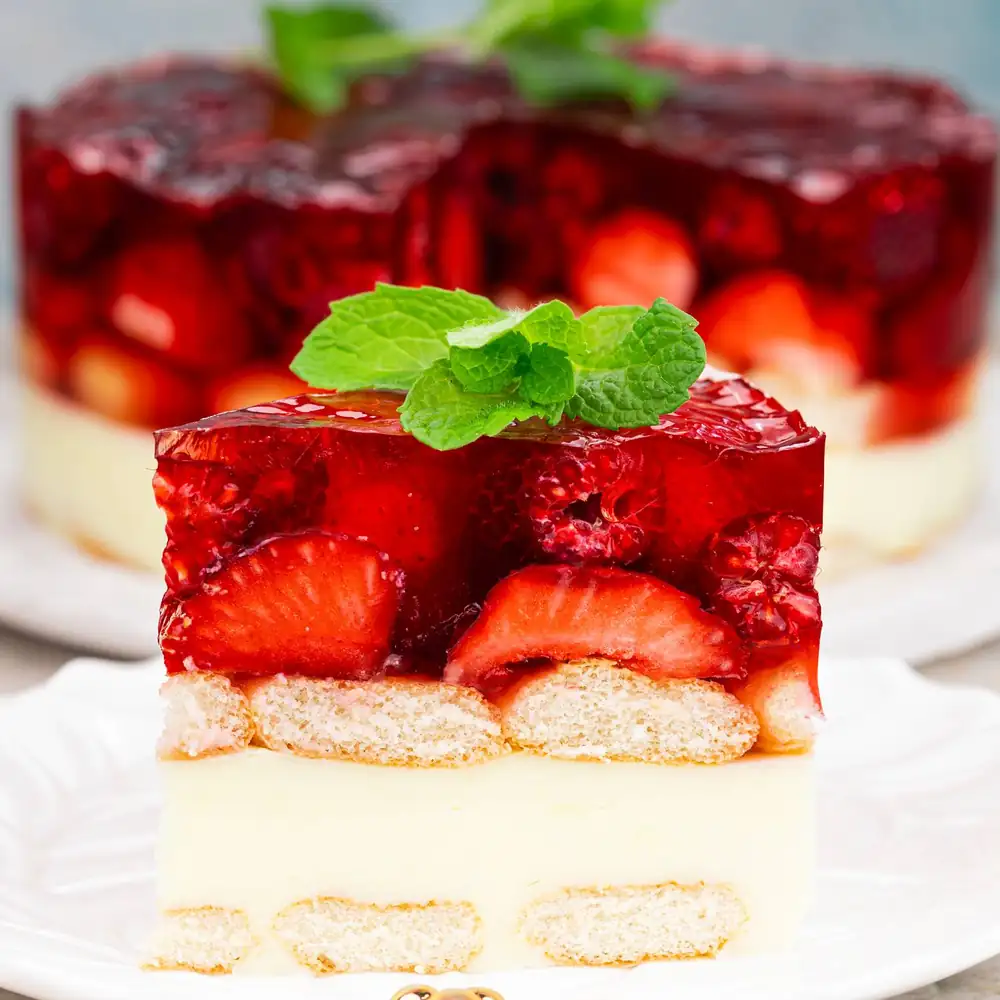
No-bake pudding
I invite you to try the most delicious no-bake pudding cake. It's super easy to make, tastes delicious, and looks beautiful. This recipe is for everyone.
- they can even be served as a cake - pudding mass without churning butter - detailed description of the preparation and photos of the steps
Preparation time: 1 hour Jelly cooling time: 3 hours Cake cooling time: 3 hours Number of servings: 20 cm cake tin - approximately 1960 g Energy value 103 kcal Carbohydrates 17 g - Including sugars 12 g Protein 2 g Fat 3 g Diet: low-fat.
130 g long sponge cakes - about 16 pieces
2 cream or vanilla puddings without sugar - 2 x 40 g
625 ml of milk or plant-based drink - 2.5 cups
50 g butter - 1/4 of a classic 200 g cube
4 flat tablespoons of sugar - about 40 g
2 jellies, e.g. strawberry - 2 x sachets of 77 g
750 ml boiling water - 3 cups of boiled water
500g of fruit - e.g. strawberries + raspberries
No-bake pudding
My glass holds 250 ml. Cake pan: I used a springform pan measuring 20 cm in diameter and 8 cm high.
The calories were calculated based on the ingredients I used. This is an approximate calorie count, as your ingredients may have a different calorie count than the ones I used. The listed ingredients yielded a no-bake pudding with jelly and fruit weighing approximately 1960 grams. Before you start preparing this dessert, I recommend reading the entire recipe first to prepare for the next steps. For example, you can pour boiling water over the jelly while preparing the batter.
Buy tried-and-true, high-quality jelly (not too sour). One sachet of jelly weighed 77 grams. The jelly packaging should state that it's a jelly that dissolves in 500 ml of boiling water. Note: We dissolve our jelly in a smaller amount of boiling water – that's correct .
No-bake pudding cake recipe
Prepare a small baking pan. I used a tall 20 cm springform pan. You can choose this or a slightly larger pan, such as a 22 cm pan (the cake will be slightly shorter and you'll probably need a few more ladyfingers). Line the bottom of the springform pan with baking paper. Spread the ladyfingers on the paper. If necessary, divide them into smaller pieces to fill the bottom of the pan as thoroughly as possible. Line the edges with foil or taller strips of baking paper. Remember that the pieces of parchment will stick to the inner edges of the pan if you first grease the inside of the pan with something like butter.
Tip: I recommend using oblong ladyfingers for this recipe. They're more delicate and lighter than round ones. They absorb moisture from the warm pudding, so there's no need to soak them. It's the perfect combination of ingredients. As for the ladyfingers, I used some "random" ladyfingers from Lidl with a sprinkle of sugar. I also recommend Ladyfingers from Andante, Savoiardi, and Matilde Vicenzi Vicenzovo il Savoiardo. The latter are a bit harder to find, but they're also great.
Prepare a thick pudding. Pour 1.5 cups (375 ml) of milk into a pot and add 50 grams of butter. In a separate container, such as a large mug, pour the remaining milk (one cup (250 ml)) and add two packets of vanilla or sugar-free cream pudding (2 x 40 grams) and 40 grams of caster sugar or powdered sugar. Stir until the milk, starch, and sugar are combined into a smooth liquid.
Bring the milk and butter to a boil. Reduce the heat to low and pour in the liquid made from the remaining milk, custard powder, and sugar. Immediately begin stirring the pudding. You can increase the heat slightly. Stir the pudding vigorously at first. Once it begins to thicken slightly, stir slowly until it comes to a boil. Then continue stirring for about a minute or a little longer, until all lumps are gone, no flour is visible, and the pudding has reached the desired, smooth, thick consistency.
While still hot (immediately after turning off the heat), carefully pour the pudding into the pan with the sponge cakes lined the bottom. Smooth the surface of the pudding.
Tip: Don't wait too long to pour the pudding into the tin, because such a thick pudding with the addition of butter sets very quickly.
About 5 minutes after pouring the pudding into the pan, you can arrange the second layer of sponge cakes on top. Trim them as before.
Evenly distribute the washed and dried fruit over the sponge cake layer. Remove the stems from the strawberries and chop them into smaller pieces if necessary. I managed to fit a total of 500 grams of the strawberry and raspberry mixture into the pan. Wild berries and blueberries also work well. I also recommend banana slices, apricot pieces, peaches, or mango. If the pudding has already cooled, place the pan with the cake in the refrigerator while you wait for the jelly. If you can't prepare the entire cake in one day, refrigerate the cake in the pan and prepare the jelly the next day.
Tip: You can also use frozen fruit. Theoretically, there's no need to thaw them (if they're going to be covered with setting jelly), as I prefer to do to deglaze any additional glaze. However, don't overpack the wet fruit, as even jelly with less water may not set perfectly, and the jelly won't cut easily.
Prepare the jelly. Pour boiling water over two strawberry jellies (raspberry, cherry, wild strawberry, or wild berry). You'll need about 750 ml of boiling water. Stir the jelly constantly until the gelatin is completely dissolved. Set the jelly aside to cool (in hot weather, you can refrigerate it after it cools, but check its consistency frequently to prevent it from setting too hard). Pour the jelly over the fruit only after it has cooled completely and has begun to set, reaching the consistency of a thicker jelly. If you pour the jelly while it's thin or still warm, you may experience jelly leaking out of the pan, jelly soaking into the sponge cakes, fruit floating on the surface, or even clouding the jelly due to it accidentally mixing with the pudding layer. Refrigerate the unbaked pudding until the jelly has completely set. This can take from three to a maximum of five hours.
I recommend garnishing portions of the dessert with mint or lemon balm leaves and fresh fruit before serving. Store the no-bake custard cake in the refrigerator. It will retain its freshness and flavor for at least four days.
Enjoy your meal.