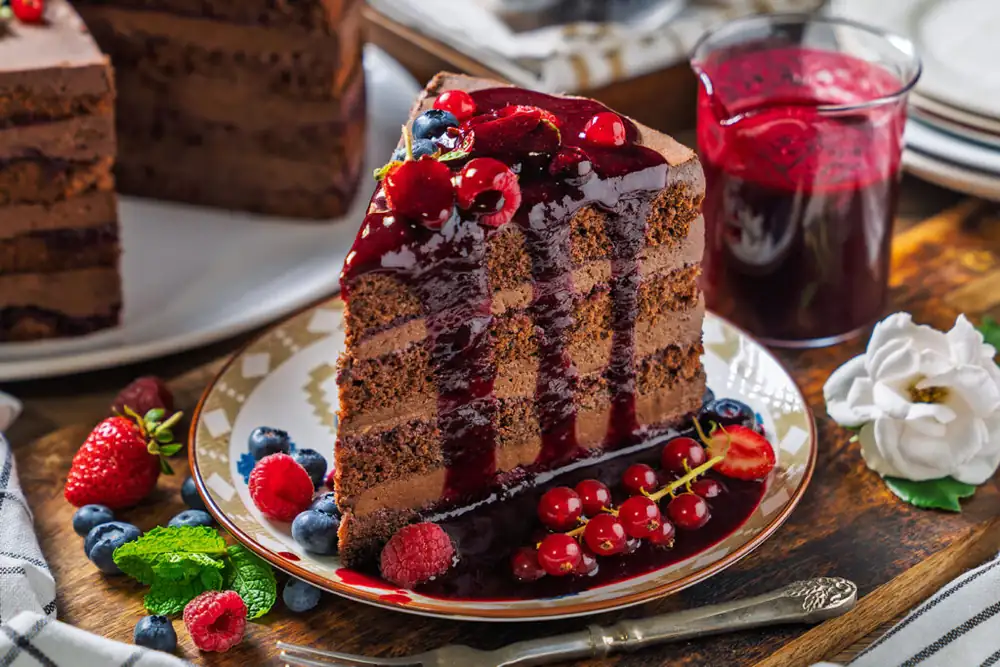
Chocolate cake with berries and mascarpone
For the cocoa cake:
- 275 g flour
- 10 eggs
- 250 g zahar
- 40g cocoa
- 50 ml oil
- a little salt
- 400 g milk chocolate
- 400 g dark chocolate (60% cocoa)
- 800 ml sour cream for whipping cream
- 500 g mascarpone
- 800 g berries (fresh or frozen)
- 200 g zahar
- 200 ml what
- 150 ml berry syrup
- 500 ml what
- Beat the eggs at room temperature with the sugar and salt, on high speed, for about 10 minutes, until they triple in volume.
- Place the cocoa in a bowl and gradually add hot water, mixing well, until you obtain a creamy consistency.
- Add the cocoa mixture over the beaten eggs, then pour in the oil.
- Gradually incorporate the flour with a whisk, using broad, bottom-up movements. Stop using the mixer at this stage and mix until the flour is no longer visible in the mixture.
- Pour the mixture into a 27 cm ring tin, lined with baking paper at the base. Bake at 180 degrees Celsius for approximately 30-40 minutes, until a toothpick inserted in the middle comes out clean.
- Let the cake cool completely, then cut it into four slices.
- Put the cream for the whipped cream in a saucepan and bring it to the boil, then turn off the heat.
- Add the dark chocolate and milk chocolate, dip them in the whipped cream and let them sit for 5 minutes.
- Mix very well until you obtain a homogeneous and glossy cream.
- Place the cream in the refrigerator for at least 4 hours, until completely chilled.
- Place the fresh or frozen berries in a saucepan, add the water and sugar.
- Let everything simmer for about 10 minutes from the moment the fruit begins to boil.
- Turn off the heat and puree the fruit with a vertical blender.
- If you want to remove the seeds, you can strain the sauce.
- Mix the well-cooled chocolate cream for about 2 minutes, until it becomes homogeneous again.
- Add the very cold mascarpone and mix just enough to incorporate well and make the cream aerated. Do not overmix or it will curdle.
- Mix the berry syrup with water to obtain the syrup needed to glaze the cake.
- Place the first slice of dough in the ring of the baking pan it was baked in and brush the syrup all over it. For the high dough, place acetate foil around it.
- Spread a layer of berry sauce on the top. If you want a thicker layer of sauce, it should be stabilized with starch or gelatin.
- Add a layer of chocolate cream and level it carefully.
- Place the next slice of cake on top and repeat the layers of syrup, berry sauce and cream. Do the same with the next slice.
- Before the last slice of cake, spread the berry sauce directly over the cream, then place the reserved slice on top with the smooth side facing up.
- Lightly coat the last slice with syrup, cover it with the remaining cream and level as evenly as possible.
- Refrigerate the cake for at least 6 hours or, preferably, overnight. Save the remaining sauce for serving.
- After cooling, open the ring of the tray and carefully remove the acetate foil.
- Leave the edges of the cake uncovered and decorate the top with fresh fruit and mint.
- When serving, pour a little berry sauce over each slice.
400 g dark chocolate with 60% cocoa
For the berry sauce:
800 g fresh or frozen berries
For the syrup for the cake:
Preparing the cocoa cake
Preparing the chocolate cream
Preparing the fruit sauce
Finishing the cream and syrup
Assembling the chocolate cake
Cooling, decorating and serving
I made this chocolate cake for my father's birthday and I wanted it to be big enough for the whole family. It has an airy cocoa base, a rich cream made from two types of chocolate and mascarpone, plus a sour berry sauce. The combination is very pleasant, because the sauce cuts the sweetness of the cream, and when sliced, the layers are beautifully visible.
Although it looks spectacular, the cake does not require complicated techniques and is especially suitable when you have many guests. It can be prepared in advance, and the fact that it stays cold for at least six hours, ideally overnight, is actually an advantage. The cream stabilizes, the tops evenly absorb the syrup, and the next day the cake is much easier to portion and looks very good on the table.