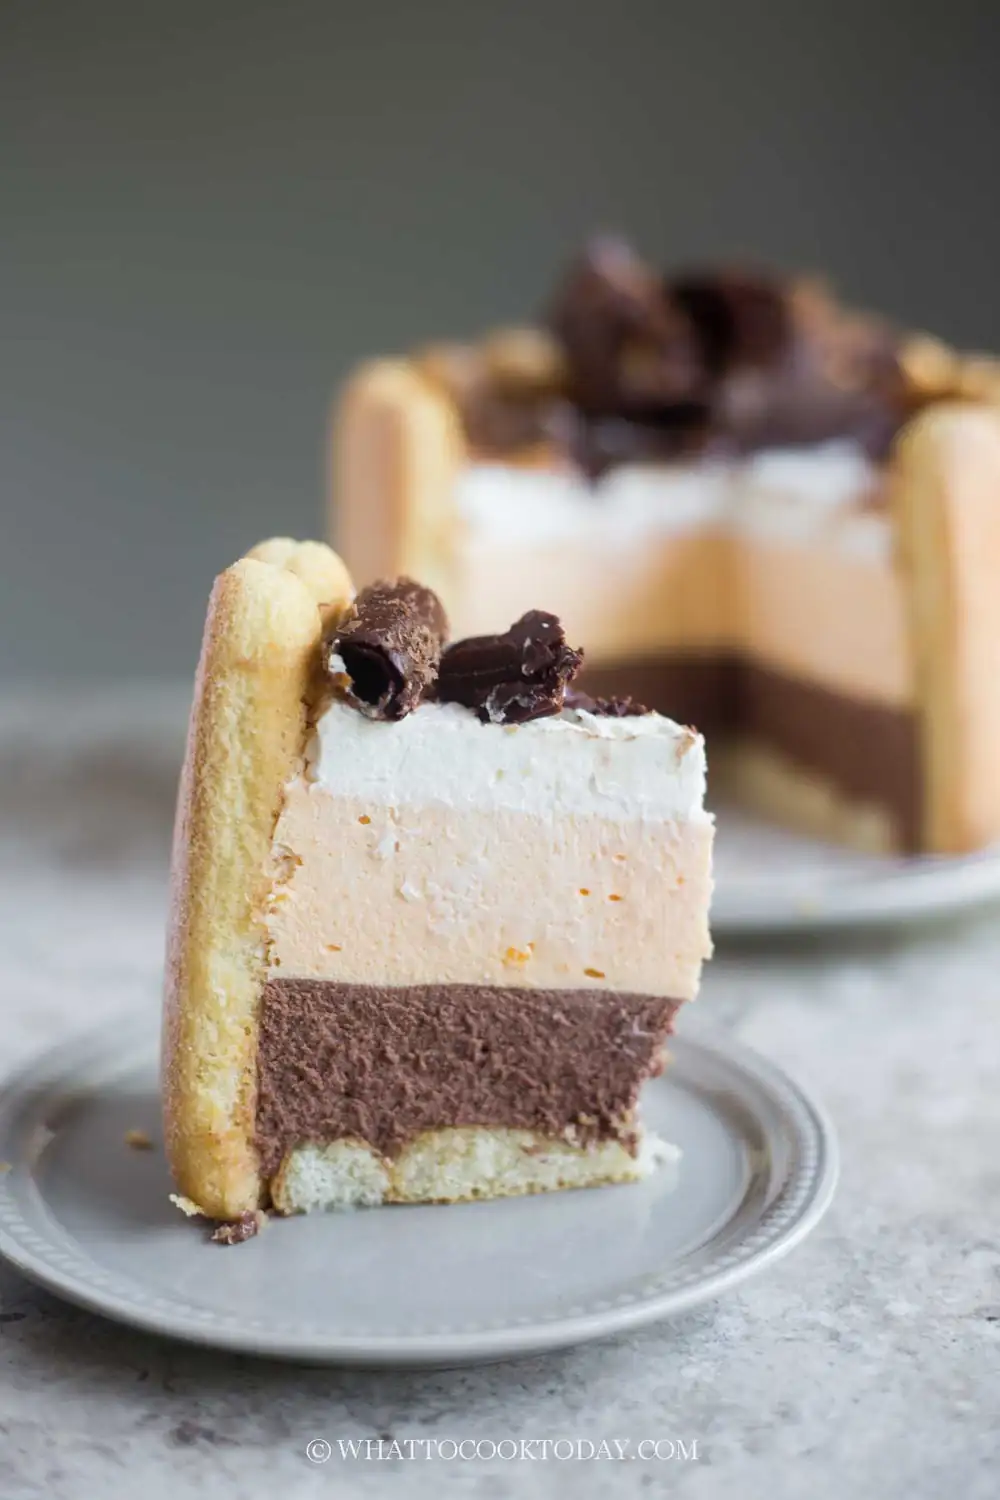
No-Bake Chocolate Orange Charlotte Cake
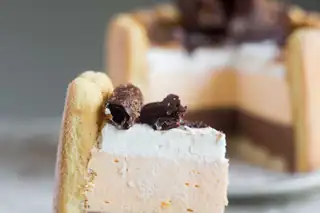
No-bake chocolate orange charlotte cake made with layers of chocolate mousse, orange mousse, and stabilized whipped cream, set in ladyfinger cookies. A make-ahead, elegant dessert perfect for celebrations or just because!
- 205 g semi-sweet chocolate
- 75 g heavy cream (at least 35% fat, for melting chocolate)
- 305 g heavy cream (at least 35% fat, for whipping)
- 1 3/4 tsp unflavored gelatin powder
- 15 g water
- 2 tsp unflavored gelatin powder
- 22 g water
- 140 g orange juice concentrate (thawed if frozen and let it come to room temperature)
- 45 g powdered sugar
- 280 g heavy cream (at least 35% fat)
- 1/2 tsp gelatin powder
- 2 tsp water
- 185 g heavy cream (at least 35% fat)
- 28 g powdered sugar
- 32 pieces lady fingers (savoiardi) (plus more)
- Milk (for dipping)
- 56 g semi-sweet chocolate
- 2 tsp unsalted butter (or shortening)
- dark chocolate bar (to shave over the cake)
- orange zest
- You can use 9-inch springform cake pan or 9-inch round cake pan with removable base. Line the bottom round with parchment paper
- If you have an acetate sheet/cake collar for baking, you can line the side of the pan with it. It helps to make the cake looks neat and easier to release. Just leave it without lining if you don't have a cake collar
- I line up the side of the pan with ladyfinger cookies, side by side.
- Then line up the bottom of the pan with the cookies too. The bottom part is a bit tricky because the pan is round and you will have to cut the cookies into size to fit and there might be a little gap here and there. I won't worry too much about it as long as the gap is not too big. Set this aside and prepare the chocolate and orange mousse
- Pour about 1/2 cup of milk into a shallow platter. Use a pastry brush to brush some milk on the cookies on the base.
- Then brush the cookies lining up the side of the pan with milk, but only brush on the side that is facing inside. We want the cookies to be soft but they need to hold the shape well so they won't fall apart when you remove the cake from the pan. I use store-bought ladyfingers, which are usually way drier, crispier and thicker because they are meant for tiramisu, so I used up almost all of the milk here.
- Place the chocolate and heavy cream in a heatproof bowl that you can set over a pot of simmering water to melt the chocolate. Make sure the bottom of the bowl doesn't touch the water.
- Place gelatin in a heatproof small bowl and add water to bloom the gelatin for 5 minutes. Then you can microwave on high for about 25-30 seconds or so or until it melts
- You can also place the bowl of bloomed gelatin in a pot of boiling hot water to melt the gelatin. Make sure the gelatin really melts. It should turn clear when it melts and not cloudy
- Stir the melted gelatin into the melted chocolate to combine
- In another mixing bowl, add cold heavy cream and start whipping at a low-medium speed until just thickened, it won't hold any shape. Add 2-3 Tbsp of the whipped cream into the melted chocolate mixture to combine them.
- Then pour the melted chocolate mixture into the whipped cream and whip again until medium-firm. Take care not to overwhip or the mousse will turn grainy and chunky.
- Pour this chocolate mousse into the pan. Smooth with a spatula. Put this into the freezer to let it semi-set quickly before we pour the second layer, the orange mousse
- Give the mixing bowl and whip a quick rinse and dry them to prepare for the orange mousse
- Like what you did for the chocolate mousse, place gelatin in the same heatproof small bowl you use earlier and add water to bloom the gelatin for 5 minutes. Then you can microwave on high for about 25-30 seconds or so or until it melts
- Add this melted gelatin to the orange concentrate and combine
- Add cold heavy cream and powdered sugar to the mixing bowl and start whipping at a low-medium speed until just thickened, it won't hold any shape. Add 2-3 Tbsp of the whipped cream into the melted chocolate mixture to combine them.
- Add 2-3 Tbsp of the whipped cream into the orange mixture to combine them.
- Then pour the orange mixture into the whipped cream. Whip again until medium-firm. Take care not to overwhip or the mousse will turn grainy and chunky. Give the mixing bowl and whisk a quick rinse again to use to prepare stabilized whipped cream
- Get the cake out of the freezer and careully pour the orange mousse on top and then smooth with a spatula
- Put this into the fridge while you prepare the final layer
- Place gelatin in the same heatproof small bowl you use earlier and add water to bloom the gelatin for 5 minutes. Then you can microwave on high for about 25-30 seconds or so or until it melts
- Add cold heavy cream and powdered sugar to the mixing bowl and start whipping at a low-medium speed until just thickened, it won't hold any shape. Add the melted gelatin into the whipped cream and continue to whip until medium-firm. Take care not to overwhip or the mousse will turn grainy and chunky.
- Spread the stabilized whipped cream on top of the orange mousse and use spatula to smooth the top
- Put the cake in the fridge and let it chill for at least 8 hours to overnight
- Place the chocolate and butter in a heat-proof bowl and set on top of a double boiler over medium low heat. When there are still a few chocolate remains, remove from the heat and keep stirring until all the chocolate has melted
- Spread this as thinly as you can and the same thickness if possible on an inverted baking pan using an offset spatula
- Put this in a freezer for 3-4 minutes or until firm. I find it easiest to use a plastic bench scraper to slowly scrape the chocolate. It will curl as you scrape. If it breaks instead of curling, the chocolate probably is a bit too firm and you can let it sit at room temperature for a minute or so and try again
- If it sticks to your scraper and too soft to curl, the chocolate is not firm enough and stick it back into the freezer for a minute and try again. It is a trial and error with the timing because it also depends on the chocolate you use and how thick or thin you spread it. So the first few rounds will be a bit of experiment
- Transfer the chocolate curls into a container using the scraper (try not to touch them with your fingers as they melt easily) and keep them in the fridge until you are ready to use them
This no-bake chocolate orange charlotte cake was made for my hubby’s birthday, and honestly, it’s one of those desserts that just feels special without being overly complicated. If you love that classic chocolate + orange combo (we definitely do!), this cake hits all the right notes—creamy chocolate mousse, bright orange mousse, and a soft ladyfinger “shell” that holds everything together. It does take a bit of planning because of the chill time, but the steps are very manageable. I always recommend making it a day ahead so it can set properly overnight and slice beautifully the next day.
It’s completely no-bake, so no oven stress—just chilling and assembling.
The chocolate and orange layers balance each other so well: rich, creamy, and refreshing at the same time.
It looks fancy (hello bakery-style dessert!) but the steps are actually very straightforward.
It’s make-ahead friendly, which is perfect for birthdays or gatherings.
You can prep most components in stages, so it’s flexible for busy days.
Orange juice concentrate (I don’t recommend using regular orange juice as it is more watery and orange flavor won’t shine through as much)
Powdered sugar (I didn’t use this and my kids say a bit too sour for their taste, but both hubby and I are fine. So I included the sugar amount in the recipe in case you prefer to add some)
Ladyfinger cookies / savoiardi (store-bought works best for structure)
Milk (for brushing/dipping ladyfingers—any dairy or non-dairy milk works)
Unsalted butter or shortening (optional, for chocolate curls)
Additional dark chocolate (for garnish)
Orange zest (optional but highly recommended for freshness)
Use a springform pan or removable-base pan—it makes unmolding so much easier.
An acetate cake collar helps give you those clean bakery-style sides, but it’s optional.
Don’t skip chilling the first chocolate layer briefly before adding the orange mousse—it helps prevent mixing.
Whip cream only to medium-firm peaks. Overwhipping = grainy mousse (learned this the hard way ).
Gelatin must be fully dissolved and clear before adding to mixtures.
Make this one day ahead for the best texture and clean slicing.
Fresh berries (especially raspberries or strawberries)
Light espresso or black coffee
Whipped cream on the side for extra indulgence.
A citrusy tea like Earl Grey or orange rooibos.
A simple fruit salad if serving for a party spread.
Can I make this without gelatin? It’s possible, but the mousse layers will be softer and won’t slice as cleanly and won’t hold up as long. I don’t recommend skipping it for this recipe.
Can I use freshly squeezed orange juice instead of concentrate? Yes, but reduce it slightly on the stove so the flavor stays strong.
Why did my mousse turn grainy? Usually from overwhipping the cream or adding gelatin that’s too hot.
Can I make this in advance? Yes—this is actually a perfect make-ahead dessert. Overnight chilling is ideal.
Can I use a different pan size? Yes, but adjust ladyfingers and mousse thickness accordingly.
Store leftovers in the fridge in an airtight container for up to 4–5 days.
For freezing, slice first, freeze until firm, then wrap individually and store for up to 1 month.
To serve frozen slices, thaw overnight in the fridge or at room temperature until softened.
No reheating needed—this cake is best served chilled.
This chocolate orange charlotte cake is one of those desserts that looks like it came from a fancy bakery, but is actually very doable at home if you break it into steps. The key is planning and letting each layer chill properly. It’s creamy, bright, rich, and refreshing all at once—and honestly, it always gets that “wow” moment when you slice into it. Perfect for birthdays, celebrations, or just when you want to make something a little extra special without turning on the oven.
For assembling the cake:
Chocolate curls for decoration: (optional)
Other decoration: (optional)